Sections of the site
Editor's Choice:
- How to unlock ariston washing machine
- Pros and cons of LED lighting
- Pulse relay: device and connection
- How to calculate the illumination of a room with LED lamps?
- Plastic box - do-it-yourself aesthetic view of electrical wiring
- Electricity consumption of a warm floor: electric and film
- Installing a pump in a well: how to properly install pumping equipment
- Electrician Toolkit Overview
- How to choose a water heater: the most complete list of evaluation criteria
- 1 acoustics on the example of Sven SPS-860 and Realtek ALC889 codec
Advertising
| Motion sensor for lighting |
|
So one of its functionalities is automatic lighting control using motion sensors. This is what I want to tell you in detail.
Purpose and applicationThe main purpose of motion sensors is to automatically turn on or turn off the load in a certain time interval when moving objects appear in the sensor's sensitivity zone. Also, such a sensor takes into account the level of illumination.
Most often, motion sensors are used to control the lighting of streets or residential premises. Currently, we are installing motion sensors for automatic lighting control of vestibules and stairwells of entrances of residential apartment buildings. Soon I will publish about 10 detailed articles about , for example, a recent article about . Subscribe to receive notifications about the release of new articles on the site. The subscription form is located at the bottom of the article and in the right column of the site. The relevance of the use of motion sensors to turn on the light is due not only to convenience and comfort. When using motion sensors, it is significantly reduced, which is important in our time, and the service life of the lamps themselves also increases. The principle of operation of the sensor
When any movement appears in the sensor's sensitivity zone, it starts to determine the level of illumination. And if the illumination level is below the triggering setting, then the sensor is triggered, thereby turning on the lamp with its output contacts. Everything is correct. The logic is here. After all, if the movement will be during daylight hours, then why turn on the light, because during the day it is already light.
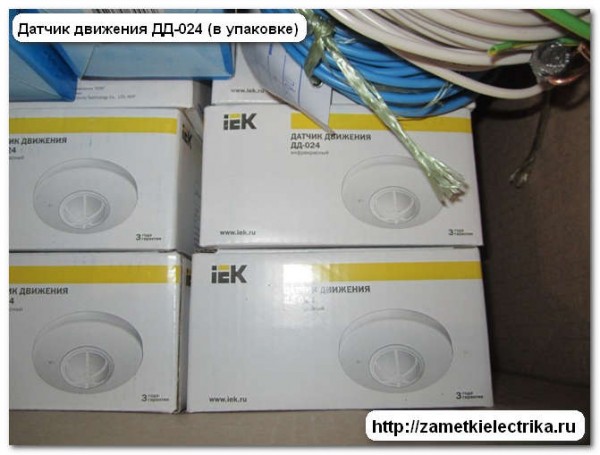
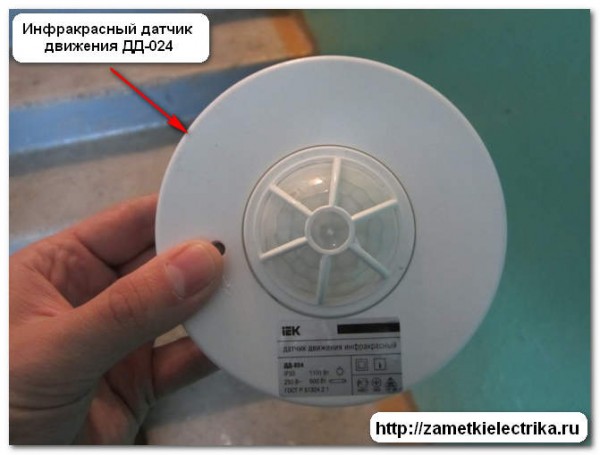
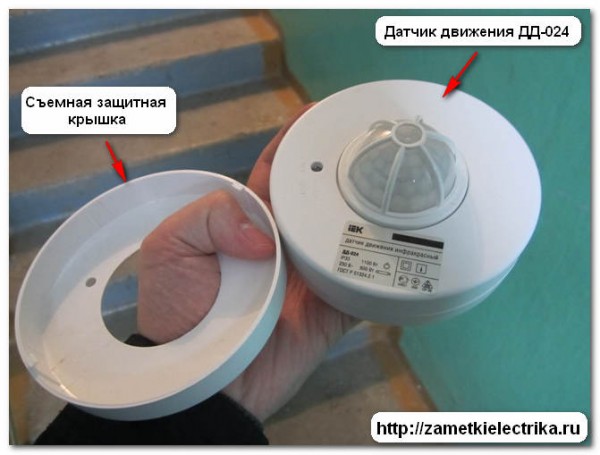
For example, for a motion sensor type DD-024, the power of the output circuits is about 600 (VA) for and 1100 (W) for incandescent lamps. Agree, very good. Motion sensor for turning on the light type DDTo implement the above, I use infrared sensors such as DD-024 and DD-024V from IEK. There were no problems with them, so I recommend them for use. This is how it looks.
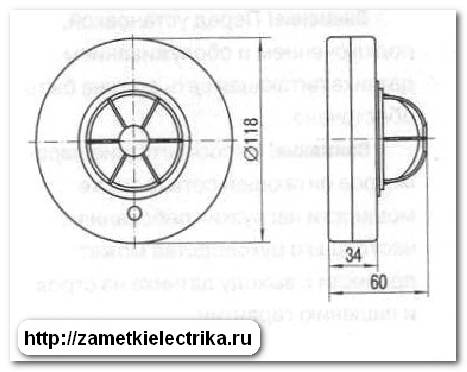
And these are its overall and installation dimensions.
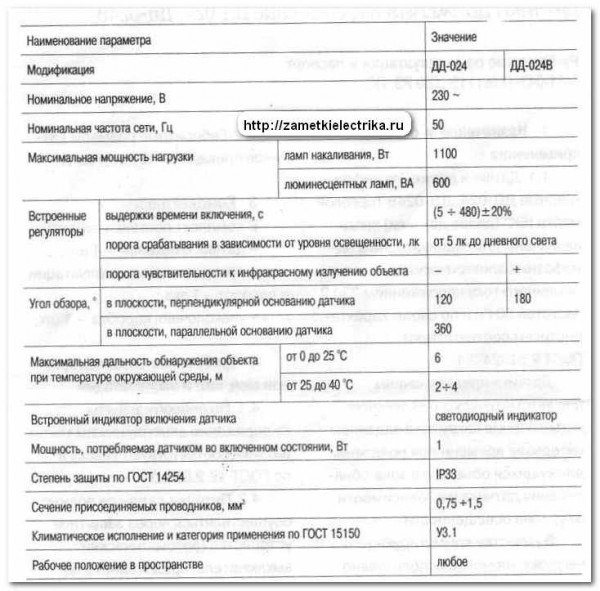
The main characteristics of the infrared sensor are presented in the table below (click on the picture to enlarge):
Installation of motion sensorsNow let's analyze the issue of installing sensors, because. their accuracy and correct operation depend on this.
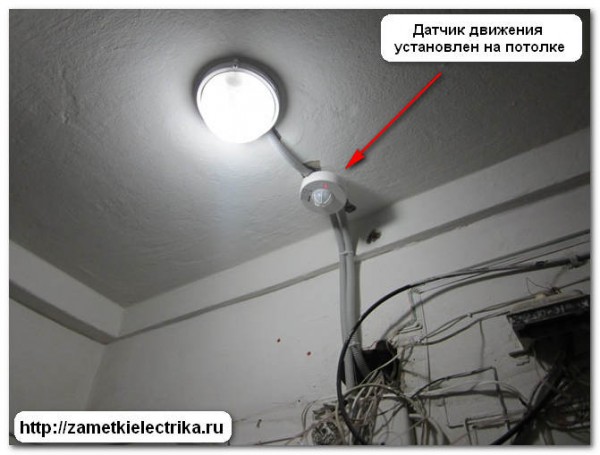
As a rule, a motion sensor to turn on the light is installed on the ceiling at a distance of 2 to 6 (m) from the floor. To avoid frequent false positives, the place of its installation is carefully chosen.
It is forbidden to install a motion sensor if its sensitivity zone includes:
When installing the sensor on the ceiling, the viewing angle is 360 degrees, which is very good. If you install it on the side wall, then the viewing angle will decrease to 120-180 degrees. The motion sensor is fixed to the surface in the following sequence. 1. Turn the protective cover of the sensor clockwise and remove it.
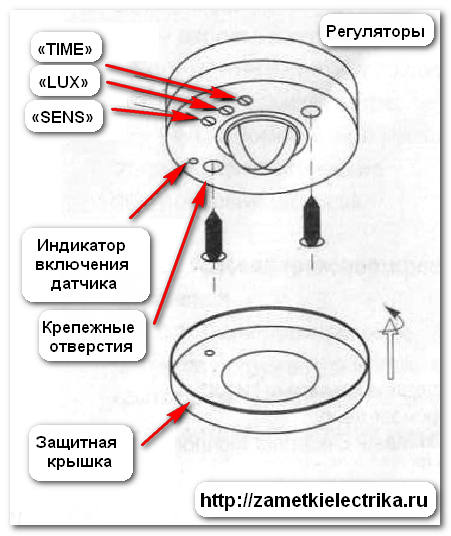
2. Access to two mounting holes and adjustment screws.
Motion sensor connection diagramThe motion sensor must be powered through either a fuse, i.e. its supply circuits must be protected.
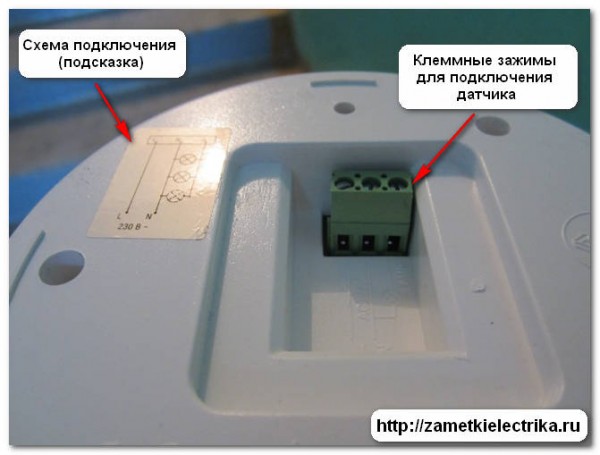
The wires are connected to the terminal clamps. should not exceed 1.5 sq. mm on copper. By the way, follow the link and find out how you can.
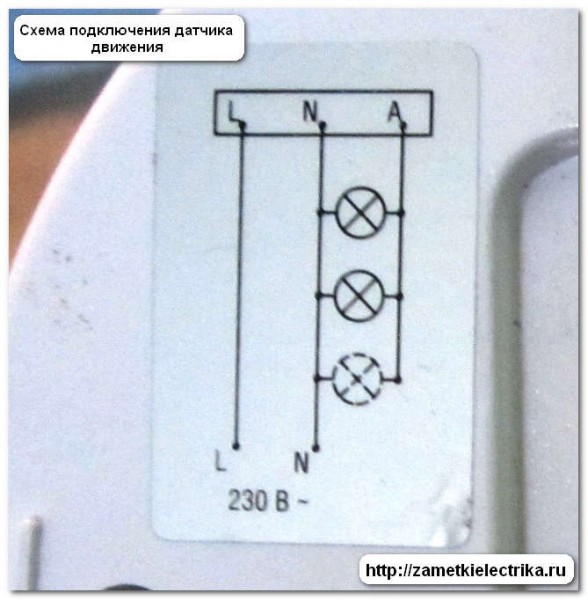
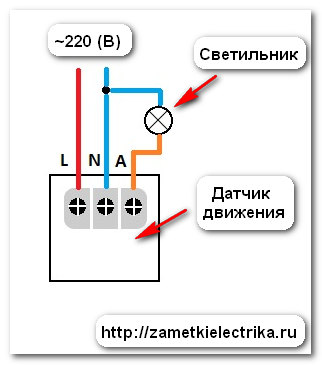
Below I will show you 3 options for connecting motion sensors for lighting. Choose your option according to your desires and needs. Option 1The first version of the sensor connection scheme is a standard solution. By the way, such a scheme is shown on the body of the sensor itself.
This circuit is the easiest to connect.
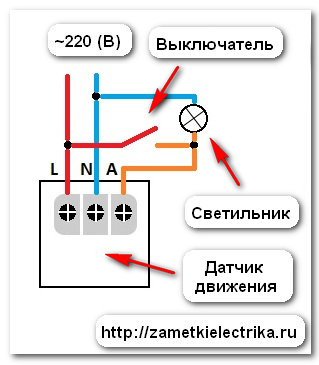
Option 2The second option (not standard) of the connection diagram, see below.
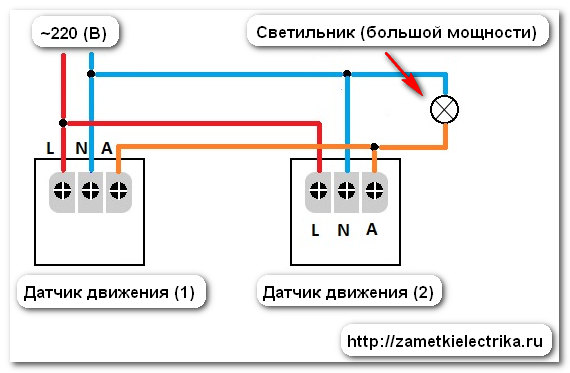
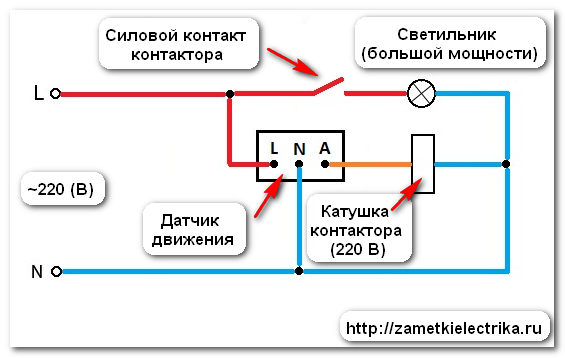
This sensor connection scheme can be used if you need the light to burn for a certain period of time, regardless of the illumination and movement. To do this, in the circuit, in parallel with the sensor, we connect the usual one (it is also possible when using one contact). Option 3The third option for connecting the motion sensor to turn on the light must be used, provided that the total output load (power of the lamps) exceeds the limit value (I talked about this at the very beginning of the article). To do this, add a contactor with a coil voltage of 220 (V) to the circuit, or use two motion sensors connected to one load. About starters and contactors more like.
Checking the sensor after connection
First of all, it is necessary to set the “LUX” regulator screw to the maximum-limit position (clockwise). The screw of the “TIME” regulator, on the contrary, is set to the minimum position (counterclockwise). Then apply voltage to the sensor. The red LED should immediately light up to indicate that the load is on.
If there is no movement, the sensor will turn off the load after about 25-30 seconds. The red LED indicator will turn off. When movement is resumed, the sensor must turn on the load again (the red LED will light up again). And in the absence of any movements, turn it off after 5 seconds.
Setting and adjustment
With the “TIME” regulator, we set the time delay setting for the motion sensor, which is in the on position. The trip setting is between 5 seconds and 480 seconds (8 minutes).
If a person will pass through this space relatively quickly (for example, a stairwell in an entrance or a corridor), then the TIME setting can be slightly reduced. If a person will be in this space for some time (for example, a pantry, utility room, car parking), then it is desirable to increase the “TIME” setting.
Let me tell you about a personal example. I put a motion sensor in my entrance, and the “TIME” time was set to the very minimum. When opening my apartment, I had to wave my hands several times in order for the sensor to work again and turn on the light on the site. A little later, I adjusted the setting to a shutter speed that was convenient for me. With the “LUX” regulator, we set the setting for operation according to the ambient illumination (from sunlight to twilight). If you have a lot of windows in the room and natural light prevails, then it is better to set the “LUX” setting to the minimum or medium division of the scale. If in the room you have little natural light and it is dark, then I recommend setting the “LUX” setting to the maximum division of the scale. Regulator "SENS" adjust the sensitivity to operation depending on the distance and volume of the object. By the way, these sensors will only respond to the volume occupied by the human body. On small animals, such as a dog or cat, the sensors should not respond.
|

New
- Rye malt and what can be done with it?
- How to make fortified wine at home
- How to speed up the fermentation process of homemade wine
- How to make wine yeast at home, instructions for use
- Unfiltered beer - a source of good mood and nutrients Wheat or barley beer
- Intoxicated sweets: seven recipes for berry tinctures
- Dessert wines: names
- Diesel heating boilers for a private house
- Analysis "in a bad society" Korolenko In a bad society reduction
- Fuel consumption of diesel heating boiler


