Sections of the site
Editor's Choice:
- How to unlock ariston washing machine
- Pros and cons of LED lighting
- Pulse relay: device and connection
- How to calculate the illumination of a room with LED lamps?
- Plastic box - do-it-yourself aesthetic view of electrical wiring
- Electricity consumption of a warm floor: electric and film
- Installing a pump in a well: how to properly install pumping equipment
- Electrician Toolkit Overview
- How to choose a water heater: the most complete list of evaluation criteria
- 1 acoustics on the example of Sven SPS-860 and Realtek ALC889 codec
Advertising
| How to properly install and connect the outlet? Wiring diagrams |
|
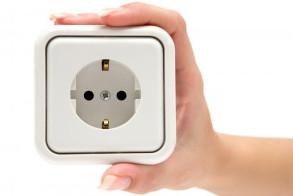
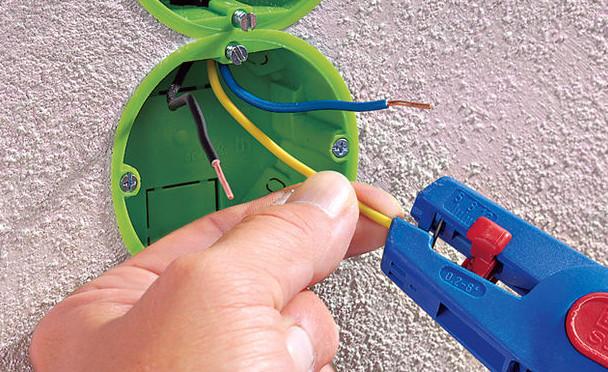
We connect the socket with our own handsWhen performing construction or repair work, it is almost impossible to do without an outlet. Therefore, let's look at how to properly install and connect the outlet. Installing a new outletConsistent installation of the socket First of all, the socket is picked up and disassembled, the outer case is disconnected from the inner part. Next, take the pliers, with which we cut off the excess wire. As a rule, no more and no less than 10 cm of wire is left for connecting sockets. It is this length that is quite enough to make the connection as high quality and convenient as possible. 1 cm of insulation is removed from each end of the wire. Stripping the ends of the wires to connect the outlet
Stripping wires with a wire stripper Placement of sockets taking into account consumers
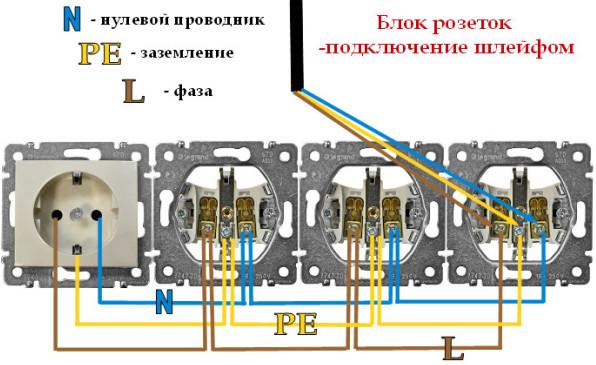
Before installing sockets, it is worth deciding on their number, as well as their location. The conditions for the placement of such elements are directly related to the location of consumers of electrical energy, which are very immobile in the form of a refrigerator, TV and computer. In such places, as a rule, several sockets are mounted (a block of sockets from 2 to 5 pieces) to provide the possibility of connecting auxiliary electrical appliances. This is a better solution than using tees and extensions. After all, this leads to an additional load on the outlet, which significantly reduces the period of its use. The socket block is connected by the loop method (in parallel)
Scheme of connecting the block of sockets - loop
Horizontal socket strip It is also necessary to take into account sockets for temporary appliances. This includes items in the form of a vacuum cleaner, a laptop, a charger for a mobile device and an iron. Most experts do not recommend installing sockets in bathrooms in order to prevent moisture from entering, which can lead to failure of the socket, and in some cases can lead to various injuries to a person. If you still cannot do without an outlet, for example, for an electric boiler, you need to install a special outlet, protected from moisture with a protection level of at least IP-44.
Surface-mounted waterproof socket for the bathroom In damp rooms, sockets with a protection level of at least IP44 are installed.
Various mounting options for socketsThe way the socket is attached is directly related to its design features, the material that is at the base of the wall, and also how the cable is laid. If it is laid in plastic boxes, then sockets are often used for outdoor installation. The fastening of such elements takes place with the help of self-tapping screws on a plasterboard partition or dowel-nails on a brick or concrete wall. When the wiring of the internal cable (hidden type) passes, the sockets must have a completely different design and they are mounted on a pre-installed box. The socket support is attached to the installation box with screws
The caliper is attached to the box with screws.
The last elements also have a different design, which is determined by the material that is contained in the base of the erected walls. If the finishing was carried out from drywall, then a hole is made in it, according to the size of the box, and the box itself is pressed against the drywall using special screws. Then the wires are connected to the outlet, and only then it is attached to the box. Installation of boxes for sockets in drywall
Installation of sockets in a plasterboard wall If you need to mount the outlet on a wall with a concrete or brick base, then you must first use a special crown and make an annular groove in the wall according to the size of the box, and only then select the middle using a chisel or puncher. A box is installed and fixed in the formed niche. Installation and fastening of the socket takes place in the same way as in a plasterboard partition. Installing boxes on a solid base
Hidden installation of sockets Outlet locationsIn the bathroom, it is enough to install several outlets to optimize the operation of the washing machine, electric shaver and hair dryer. Up to 4 outlets are installed in standard room spaces, and at least one outlet will be required in the hallway. Lines must be provided with RCD protection to protect a person from electric shock. Risk of electrical injury if there is no RCD
When connecting groups of consumers, you should not rush, because the durability and efficiency of the sockets will depend on the correct performance of the work, and in addition, your safety. We connect sockets in accordance with the colors of the wiresFor convenience, when performing work in the production of electrical wires, color shades are used to accurately determine the purpose of the wire. So, blue indicates that the wire should be connected to "zero", wires with white shades are connected to the phase, and wires with a yellow-green tint are connected to ground. This is the most common color palette of wires, there are other colors of wires. We connect sockets according to the color of the wires
Connecting sockets by color Having figured out which wire to which terminal to connect, you can get to work. The end of the wire is inserted into the socket and is tightened to the maximum using the screw provided.
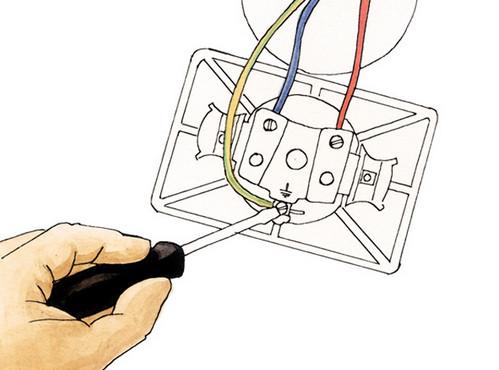
After the wires are connected to the outlet, it must be inserted into the box. The socket is fixed with the help of special clamps, which, as they are screwed in, diverge and are pressed against the walls of the socket box. When the socket is securely installed in the box, the outer cover is installed. Installing the outlet cover
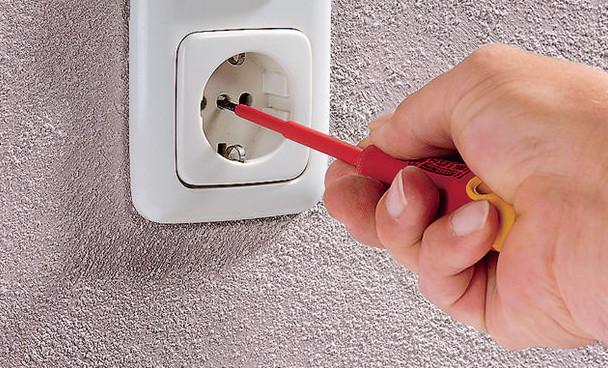
Tighten the cover of the socket with a screw All that is required is to attach the cover to the inside of the socket and tighten them together with a screw. Care must be taken when tightening the screw, as if the screw is overtightened, the outlet cover may break. All connection is completed, now we turn on and check the work we have done, and if everything is in order, you can start operating the outlet. Make sure there is power at the outlet
Testing the outlet for power Video. How to properly install and connect the outlet? |


New
- Tonsillitis in adults - what is it, symptoms and treatment, causes, photos and first signs What is throat tonsillitis
- Diseases of the male genital area Chronic inflammatory diseases of the female genital area
- Signs of gastric and duodenal ulcers
- Prostate cancer of the fourth stage: the possibilities of modern medicine
- What is useful lemon water for weight loss, face, hair
- How to talk to a girl and not seem boring What is the best way to communicate with girls
- Foods rich in zinc
- Is the treadmill an indispensable exercise machine or just a complex toy?
- Kievan Rus: education and history
- What vitamins are good for facial skin?


