Sections of the site
Editor's Choice:
- How to unlock ariston washing machine
- Pros and cons of LED lighting
- Pulse relay: device and connection
- How to calculate the illumination of a room with LED lamps?
- Plastic box - do-it-yourself aesthetic view of electrical wiring
- Electricity consumption of a warm floor: electric and film
- Installing a pump in a well: how to properly install pumping equipment
- Electrician Toolkit Overview
- How to choose a water heater: the most complete list of evaluation criteria
- 1 acoustics on the example of Sven SPS-860 and Realtek ALC889 codec
Advertising
| How to install an exhaust fan in the bathroom |
|
If you begin to notice that mirrors and walls in the bathroom are constantly fogging up, and the air has become stale from mold, then natural ventilation can no longer cope with its task. This problem is solved simply - you need to install an exhaust fan, and the humidity will return to its usual norm. The choice of modern exhaust devices allows you to install simple and inexpensive models or silent devices with timers and sensors. The room will have the most efficient air exchange if you know what parameters you need to choose fans and how to install them correctly with your own hands. We select the desired model
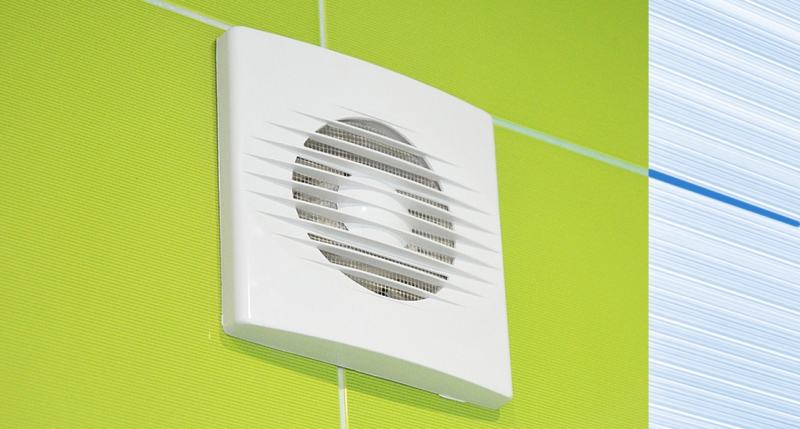
Most consumers choose built-in or surface-mounted wall models for the bathroom. They are easy to use, easy to install, clean and replace. They look quite aesthetically pleasing due to their compact size and modern body design, they fit well into any bathroom interiors. Simple models with a built-in or external switch turn on and off as needed. But even such a simple fan can be connected to the general switch in the bathroom, and then, simultaneously with the general light, the hood automatically turns on. It turns out conveniently, but in this option, moisture does not always have time to completely go into the ventilation duct, but electricity consumption is reduced. Automatic exhaust devices are equipped with special humidity sensors and turn on automatically when the moisture level exceeds the norm. Models with motion sensors immediately turn on when a person appears and turn off when no one is in the bathroom. There are also automatic fans with timers that operate only at a set time interval, and this period can be adjusted. Axial or channel?
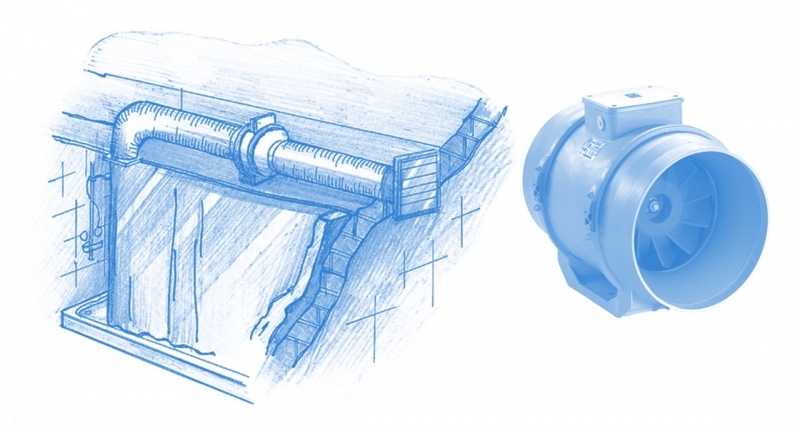
In axial fans, the air flow goes along the axis of rotation of the blades, which explains the name. They usually have a cylindrical body, an impeller with blades and an electric motor. The special structure of the blades reduces airflow resistance, so the fan has good performance. But for these devices to be effective, the length of the duct should not exceed 4 meters. The area of \u200b\u200bthe bathroom also matters - the smaller it is, the more efficient the hood works.
But for bathrooms of a large area, a duct (centrifugal) fan is better suited. It has a slightly different design: a drum with many narrow blades rotates inside the cylindrical body, and the centrifugal force of these blades draws air into the ventilation duct. Such a fan is well suited if your duct is more than 4 meters long. Extraction from it can take a long time, but it is better to connect the device to a switch in the bathroom or to a humidity sensor. This will allow you to use electricity more economically. Determine the desired performanceThis, perhaps, will be the main criterion, and the efficiency of air exchange will depend on it. Pay attention to choosing the correct fan power according to the size of your bathroom, because the same fan will give different results in small and large rooms. According to sanitary standards, the air exchange rate for the bathroom is set at 6-8 units. This means that within one hour the entire volume of air in the room must be completely replaced 6 to 8 times. It is generally accepted that if the bathroom is used by no more than three people, then a multiplicity of 6 is suitable, and if more than three, then a multiplicity of 8 is chosen. To determine the required exhaust power, you need to determine the volume of the room and multiply it by the air exchange rate. If, for example, the dimensions of your bathroom are 1.7x1.9 m 2 with a ceiling height of 2.65 m, then the volume will be 8.56 m. Round this number to 9 and multiply by a factor of 6 if three people use the bathroom. It will turn out 54 m 3, and the best choice for such a bathroom would be a device with a capacity of 54 m 3 per hour, preferably even a little more so that there is a small margin of productivity. We install it ourselvesInstalling the fan itself is simple and takes little time, but you need to think about the connection method in advance and, if necessary, lay the power cable. It is better to place all wiring in gates and close it with a lining to eliminate the risks of contact with water. If you are planning a ceiling fan, on a false ceiling, then strobes are not needed there - the wiring can be attached to the ceiling with plastic clamps. But all wires must be in the corrugation. To work, you will need a small set of tools: a drill with concrete drills, a pencil, connecting terminals, a regular and indicator screwdriver. For safe connection of the fan, it is better to use a three-core VVG cable, which allows you to supply ground, neutral and phase to the device from an external switch. You can install this switch as a two-button one - then you can control the fan regardless of the light. We drill according to the markup
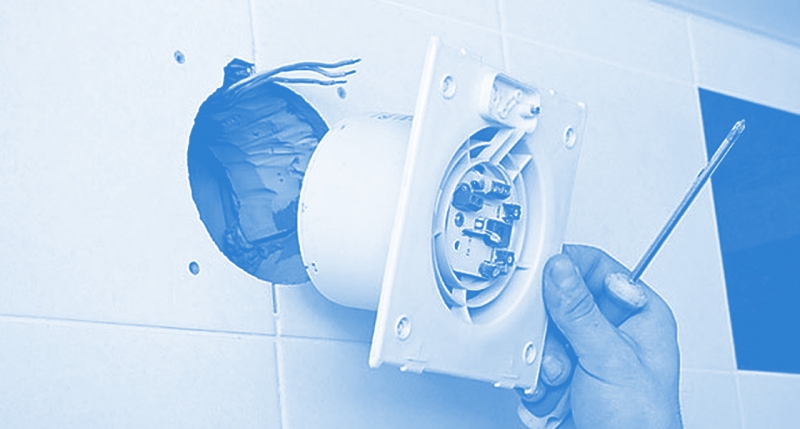
Having removed the front panel from the device, insert the fan into the hole and align it with the seams of the tiles or the building level. We mark the places of drilling with a pencil through the holes in the body. If the fan kit has a cord-switch, it must be temporarily removed, and then connect the wires in the terminal. With a drill with a pobedite tip at low speeds, we drill through the tile through at the marked points. Then, with a new drill, we go deeper into the concrete in the puncher mode. We clean the holes from dust and insert plastic dowels into them. We try on the fan again to the hole to determine the location of the cable. In this place, you need to make a semicircular groove according to the size of the wire section. A hole for the wire must also be drilled on the body of the device. We pass an electric wire through this hole and carefully insert the fan into the opening. We fix it to the wall with self-tapping screws using a screwdriver. We connect the wires in series with each other with terminals, and for greater reliability we close the connection points with heat-shrinkable tubing or electrical tape. We close the fan with a lid, turn on the power and check the operation of the hood. Then we install a protective grid and fasten the front panel.
You may decide to do without a mesh, as it quickly becomes dirty, and the fan no longer develops the desired performance. However, the protective mesh can be removed regularly and washed with soap and water. But if you notice that the hood still began to work weaker, it means that there are problems in the common exhaust duct. In apartment buildings, this is done by specialists. And in your own house, you can clean the ventilation system yourself. After installing the fan, this task will seem quite simple to you. |


New
- Kievan Rus: education and history
- What vitamins are good for facial skin?
- Rudbeckia is spinous. Rudbeckia is a perennial. flower planting technology
- Secrets of losing weight by Ksenia Borodina What pills did Ksenia Borodina take for weight loss
- Kuriles: history with geography History of the disputed Kuril Islands
- Beer styles: porter and stout, lager and ale
- The optimal temperature for each stage of the distillation of moonshine and mash
- Rye malt and what can be done with it?
- How to make fortified wine at home
- How to make wine yeast at home, instructions for use


