Sections of the site
Editor's Choice:
- How to unlock ariston washing machine
- Pros and cons of LED lighting
- Pulse relay: device and connection
- How to calculate the illumination of a room with LED lamps?
- Plastic box - do-it-yourself aesthetic view of electrical wiring
- Electricity consumption of a warm floor: electric and film
- Installing a pump in a well: how to properly install pumping equipment
- Electrician Toolkit Overview
- How to choose a water heater: the most complete list of evaluation criteria
- 1 acoustics on the example of Sven SPS-860 and Realtek ALC889 codec
Advertising
| Illumination under cabinets in the kitchen from LED strip: selection of elements, schemes, do-it-yourself installation |
|
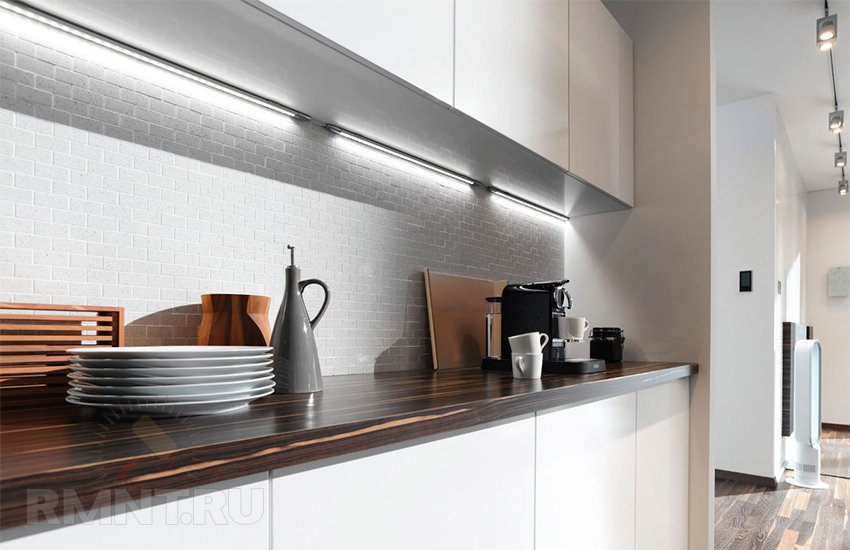
LED lighting under cabinets in the kitchen is ergonomic, beautiful and modern. In the article we will talk about how to choose the right elements of the system, what connection schemes are available, how to install the tape as an independent element and in a special box (profile). The choice of LED strip for lighting under cabinets is an interesting, effective and not too difficult solution for a home master. Such additional lighting, of course, also performs aesthetic tasks - highlights individual functional areas, accentuates decorative elements with color, sets a fashionable, modern tone for kitchen design.
Choosing an LED StripAn important characteristic of the LED strip for mounting under cabinets in the kitchen is resistance to water vapor. Insufficient moisture protection can lead to a short circuit, and, therefore, to the risk of fire. When buying a tape, you need to pay attention to the degree of protection of the shell, which is marked with a two-digit number after the Latin letters IP. The first digit indicates protection against dust and dirt, mechanical damage. The second number is moisture protection. The security of the device or device is evaluated on a scale from 0 to 9 for both parameters. In terms of tightness (moisture and dust resistance), LED lamps and strips can be marked:
If the chosen lamp or strip with LEDs does not have enough security, it is necessary to use a protective cover or special profiles in order to ensure an adequate level of security together.
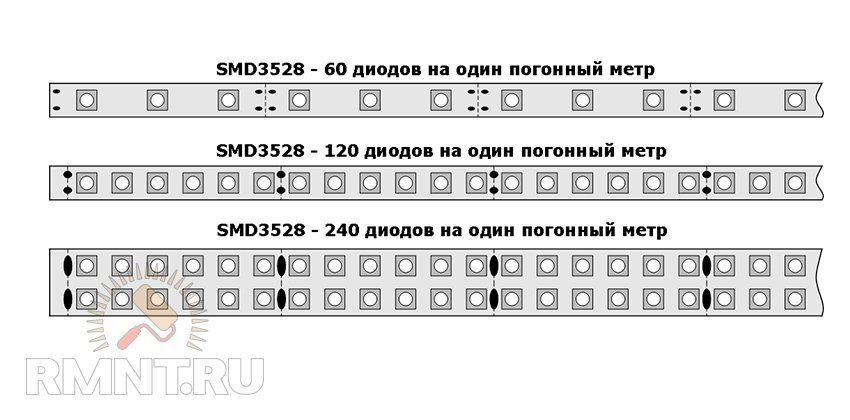
In order for the LED strip to give enough light, it is important to choose the right power density, which is characterized by the number of LEDs per linear meter. Each type of tape can have a different number of LEDs. This can be determined both visually and by examining the characteristics of the product. For decorative purposes, 30 or 60 LEDs per meter are usually sufficient. To fully illuminate the work surface, it is better to choose a tape with 120 or 240 diodes.
When calculating the illumination, you need to take into account the power consumed by the tape, remembering that compared to incandescent lamps, the luminous flux of LEDs is about 5 times higher. Table. Tape power calculation The numbers in the tape marking indicate the size of one LED:
For monochrome tapes with the specified characteristics, the luminous flux, measured in lumens, which is another characteristic of LEDs, will be maximum. For polychrome RGB strips, the color of which is set depending on the settings of the regulator or control controller, the total number of crystals in each diode corresponds to a combination of basic colors that are not switched on simultaneously. Therefore, when working only part of the crystals that give a certain color, the luminous flux will be lower.
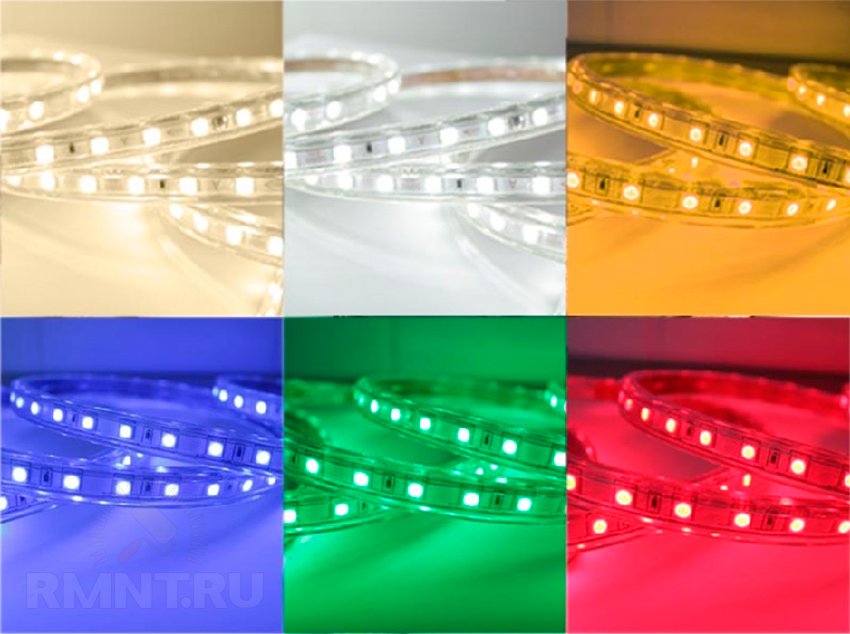
The colors of monochrome diodes with their own crystal glow are:
The color of monochrome diodes is characterized by a narrow spectrum of luminescence, which should be taken into account when choosing a backlight. The color of objects and, most importantly, products is significantly distorted, they may not look the same as under natural light or illuminated with fluorescent lamps. The white monochrome LED is a semiconductor that emits ultraviolet light coated with a phosphor. The principle of operation is similar to the usual for most fluorescent lamps. Hue can also be from "warm" to "cold" and is indicated in the form of the corresponding glow temperature, measured in Kelvin, as with conventional LED lamps.
The color of the surface of the printed circuit board on which the LEDs are located is usually white, but other colors can be chosen: brown, yellow, black, which will look better on furniture when installed outdoors. For ease of installation, the tape is equipped with adhesive tape on the reverse side. Selecting a power supply and accessoriesIt is impossible to turn on the LED strip in a household outlet - it will burn out immediately. It is designed to work at direct current with a voltage of 24 or 12 V, obtained through an appropriate pulse converter (power supply). The power of the device must correspond to the total power consumption of all connected tapes. For example, you need to connect three reels of 5 m each SMD-5050, with a power of 7.2 W / rm. m. The total capacity is: 5 m 7.2 W/rm m = 36 W The power supply is chosen with a margin of 20%, therefore, you will need a device with a power of at least 45 watts. The design of the block may be different:
The power supply for the kitchen must be moisture resistant or installed in a place protected from moisture. It is desirable that the driver contains protection against voltage surges, which prolongs the life of the LEDs.
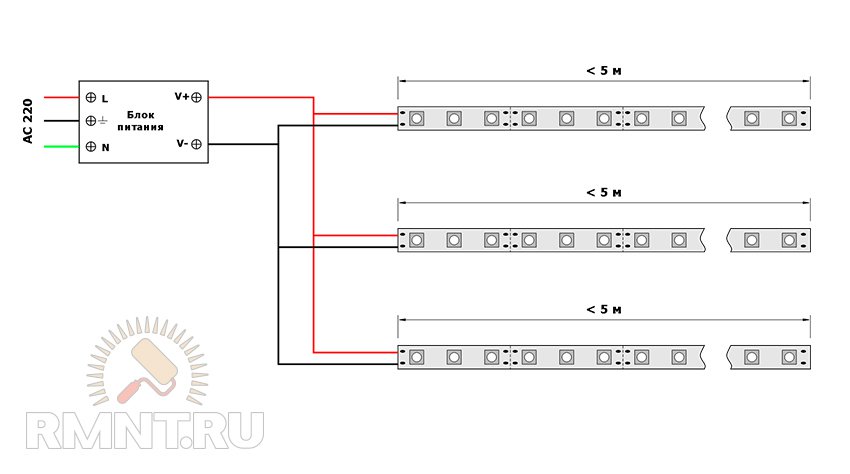
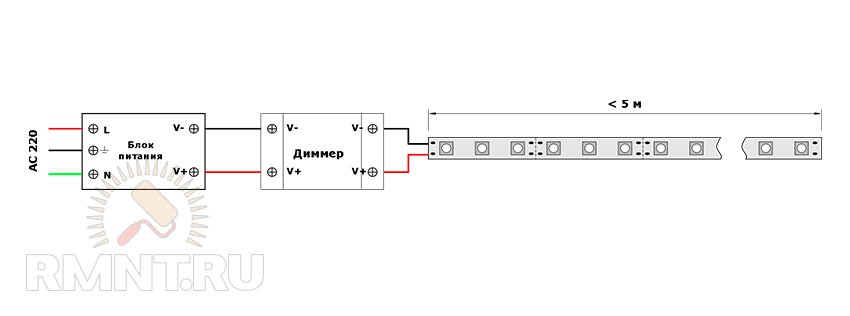
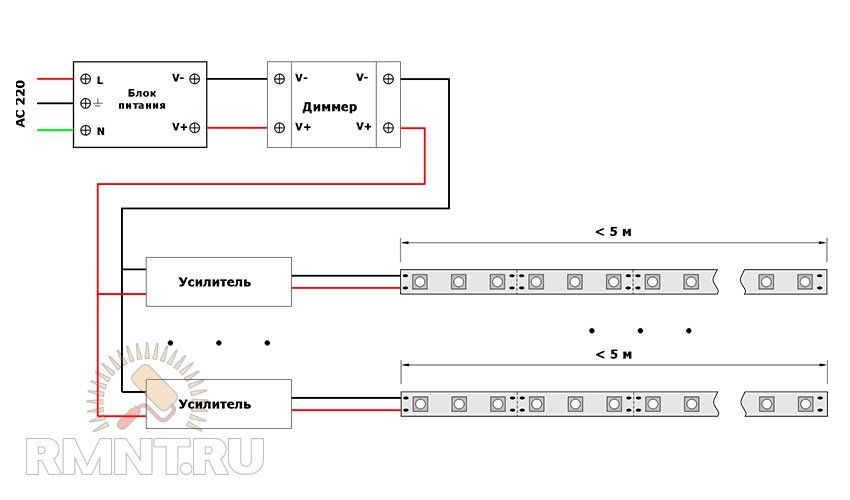
LED strips are not recommended to be connected in series, otherwise the wear will be high and the luminosity will be uneven. When connecting several tapes, it is correct to use an amplifier that provides uniform current supply to various parts of the electrical circuit. If desired, the backlight can be connected through a dimmer - a device that smoothly reduces the power and luminosity of lighting fixtures. So you can maintain the backlight in the "work" and "rest" modes.
Amplifiers and dimmers are matched to the backlight system according to the current strength. LED backlight connection diagramsBasic rules for connecting backlight elements to a circuit and installation:
The places where the LED strip can be cut are usually shown on the product itself. Below are the basic connection diagrams for monochrome and RGB tapes.
RGB tapes are connected to the controller with four wires, three of which are responsible for one of the colors, the fourth is common. Marking: R - red (red), G - green (green), B - blue (blue). Wire "V-plus" - common. The connection is easiest to make with a connector, but you can also carefully solder it. For autonomous connection of the controller and amplifier, sometimes two power supplies are used in the connection scheme. Tools and materials for mounting LED stripsFor self-installation of LED strip under kitchen cabinets, you will need:
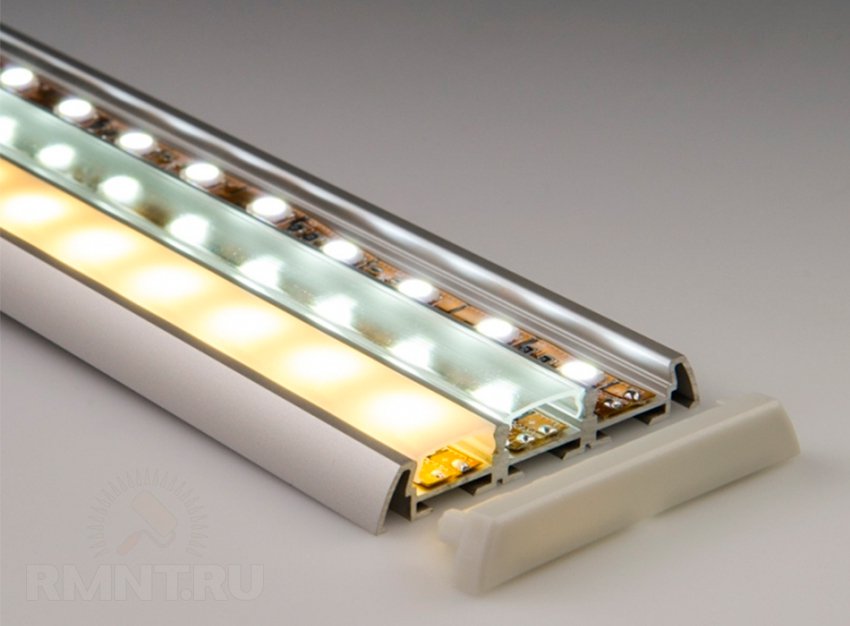
It is important to understand that LEDs still generate heat while glowing. It is directed to the substrate, the basis of the diode. In order to prevent overheating of semiconductors, which significantly reduces their service life, it is advisable to stick the tape on a special aluminum profile or a substrate with high thermal conductivity.
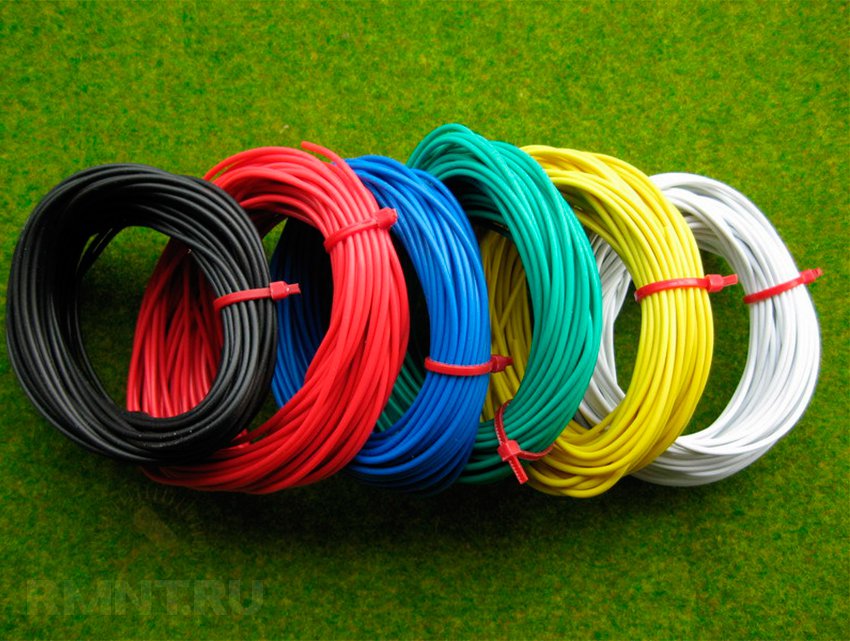
Cable section selectionAs a rule, a cable with a cross section of 0.5-2.5 mm 2 is used to install the backlight in the kitchen.
The cross section of the cable also depends on the length of the wiring, the longer the wire, the less power will be supplied to the light source, as can be seen from the following table:
Installation of LED strip under kitchen cabinetsThe basis of a well-conducted installation is thoughtful planning - how to choose, where and which circuit elements to place. The LED gives a directional beam of light, most often it is a sector of 120 ° strictly along the central axis of the semiconductor. Less common options are 90°, 60° and 30°. Having fixed the tape at the bottom of the hanging cabinet and stepping back from the wall, a very clear strip is formed on the vertical surface, moreover, wavy between light and shadow, which can adversely affect the overall picture.
It is necessary to distribute the light source so that the dividing strip of light and shadow from the backlight falls on a natural border, for example, between the edging of the work surface and the wall cladding. In the simplest case, the tape is mounted close to the wall in order to illuminate it completely. By choosing different options, you can work with the visual “depth” of the work surface to the benefit of the overall design. Ribbons with diodes with a narrow lighting sector can be mounted on the very edge under the cabinet so that the wall is not illuminated at all. A universal way to distribute light is to use aluminum profiles with light-diffusing protective films. Even the height of the profile sides, if desired, you can form the desired shape of the spot of illumination.
The installation itself, with some skill in working with the tool, is not very difficult.
If, due to increased power or for aesthetic reasons, it is planned to install the tape in a profile, then at first it is easier to lay the LED strip in the profile and connect the power leads. After that, using double-sided tape, the profile is fixed on the cabinets. You will have to change the sequence only if the profile is fastened with self-tapping screws screwed in from its inside. In the next video, the same master as in the previous video gives advice on mounting the tape in the box. |
|||||||||||||||||||||||||||||||||||||||||||


New
- Kievan Rus: education and history
- What vitamins are good for facial skin?
- Rudbeckia is spinous. Rudbeckia is a perennial. flower planting technology
- Secrets of losing weight by Ksenia Borodina What pills did Ksenia Borodina take for weight loss
- Kuriles: history with geography History of the disputed Kuril Islands
- Beer styles: porter and stout, lager and ale
- The optimal temperature for each stage of the distillation of moonshine and mash
- Rye malt and what can be done with it?
- How to make fortified wine at home
- How to make wine yeast at home, instructions for use


