Floor coverings made of wooden planks are popular not only for flooring in a living room, but also for making surfaces on a balcony, loggia or terrace. The wooden floor on the balcony is nice and warm. Moreover, the comfort of the surface is provided not only by the possibility of laying insulation under the plank floor, but also by the features of the material. Subject to the installation technology, the balcony flooring will serve you for more than a decade. If you do not know how to make a wooden floor on a balcony with your own hands, the step-by-step instructions from our article will help you with your work.
Advantages and disadvantages of a wooden balcony floor
Before making a wooden floor on the balcony, consider the main pros and cons of such a coating. Wood floorboards are a natural material traditionally used for flooring. Wood has a low thermal conductivity, so a floor on a balcony made of boards is the best option for a comfortable and warm covering in a room without heating.
The advantages of such flooring include the following:
- aesthetic appeal;
- the ability to use in any interior;
- ease of processing (fastening and cutting of wood is carried out without the use of special equipment);
- environmental friendliness is very important for homes with children and allergy sufferers;
- if you lay a floor made of solid beech, oak or larch wood, then the surface will serve you for several decades while maintaining all the operational characteristics;
- the best solution for balconies with a low floor is to cover it with a boardwalk along the logs (as a result, it will be possible to understand it to the level inside the room);
- to level the uneven base of a concrete slab, the easiest way is to put a plank covering;
- installation of a wooden structure will allow for high-quality insulation of the balcony;
- plank floors can be laid even on shabby concrete slabs, since the structure does not load them at all.
The wooden floor on the loggia or balcony has its drawbacks:
- wood is susceptible to decay, mold and insect damage;
- the material is highly flammable;
- wood quickly absorbs moisture from the air and deforms from this.
Important! All wood imperfections are minimized if the elements are treated with antiseptics to protect against decay and fire retardants to prevent fire. In order for the coating to absorb moisture so quickly, the floors are painted with paints and opened with varnishes.
It is best to cover the floor with boards on a glazed balcony, so the operating conditions will be as close as possible to the living quarters. If you decide to cover an unglazed balcony with a plank floor, then carefully consider the choice of wood. Give preference to moisture resistant species, such as larch, and get ready for more thorough surface care.
Preparation of the concrete base of the balcony
If you are making wooden floors on the balcony with your own hands, then pay special attention to preparing the base. If the concrete slab is strong enough and in good condition, then the preparatory work is as follows:
- Using a cement-sand mortar, we seal up all cracks, holes and crevices in the base. Using polyurethane foam, we seal all joints of structures.
- We proceed to leveling the surface. To do this, cut off the protruding mortar, concrete and mounting loops.
- We prime the surface using deep penetration primer solutions. They are applied to the concrete slab and the lower part of the walls.
If the concrete slab is old and has many defects, a new screed is made:
- Waterproofing mastic is applied to the joint between the wall of the house and the slab. The composition is put on a wall and a slab 10 cm wide.
- Along the perimeter, we fix the temporary formwork to a height of 100 mm.
- We install lighthouse rails along the slab. Align them horizontally to the level.
- We fill in the cement mortar and level it over the beacons.
- The next day, we take out the lighthouse rails and seal the voids with a solution.
- Let the screed dry for a couple of weeks.
Floor waterproofing

When making a wooden floor on the loggia with your own hands, do not neglect the waterproofing of the base. It will protect the floor from dampness, mold and mildew. For this purpose, the surface can be treated with impregnation, paint, waterproof plaster, rubber, liquid glass and covered with roll materials.
When waterproofing, pay attention to the following recommendations:
- The easiest way to do waterproofing using plastic wrap. The material is laid with an overlap, and the joints are glued with tape. Use two layers of film and roll it up to the wall 150 mm high.
- Roofing material is laid on bituminous mastic, applying it with a spatula to the base. And the roll material with the already applied mastic is simply warmed up before laying.
- Painting waterproofing suitable for independent execution. Usually, latex-acrylic compounds are used, which are applied with a wide brush to the floor and bottom of the wall.
- Mixes for penetrating waterproofing applied in several layers to walls and floors. The substance crystallizes in the pores of the material and reliably protects against moisture.
- To apply moisture resistant plaster use a brush or putty knife.
- Liquid rubber and the same glass are the most reliable materials for waterproofing.
Installation of a wooden floor on logs
The floor on the balcony of a wooden house is often below the floor level in the room, so while walking you have to overcome a step, which is not very convenient. Thanks to the installation of the floor along the logs, it will be possible to smooth out the height difference and bring the surface to the same level with the floor in the apartment.
Installation of a log for a floor
To make the frame, a dried timber is used. Its cross-section is determined from the height the surface is lifted minus the thickness of the boardwalk.
We carry out the work in the following order:
- We lay two beams along the longitudinal edge of the balcony and against the wall.
- Next, we measure the distance between them and cut the bars of the same length. There are enough transverse bars so that they can be laid with a step of 800 mm across the balcony.
- We treat the blanks with an antiseptic and cover with linseed oil.
- We lay out the bars and level them in a horizontal plane. We fasten the extreme longitudinal and extreme transverse bars to each other with metal corners and self-tapping screws. Align the structure horizontally by placing plywood trimmings or wedges under it.
- Inside the frame, we install the remaining transverse bars and fasten them to the crate with corners and self-tapping screws.
Important! We fix the resulting wooden frame with dowels to the concrete base.
Floor insulation with logs

Despite the low thermal conductivity of wood, the structure must be additionally insulated. This is simply necessary if there is an unglazed balcony or open space below. For insulation, rigid board materials and roll insulation based on mineral wool are used:
- extruded polystyrene foam;
- slag wool;
- perlite-cement slabs;
- glass wool;
- basalt wool.
The insulation is cut into rectangles of a suitable size and laid between the lags. For tight packing, the dimensions of the insulation are taken a couple of centimeters more than the gap between the structures.
Important! A balcony without glazing is not insulated due to the lack of such a need and due to the possible accumulation of moisture in the insulating material.
It is also allowed to use bulk materials as insulation. Expanded clay, sawdust, granulated expanded polystyrene, ecowool, vermiculite are suitable for filling the voids between the lags. The selected insulation is poured into the space and slightly compacted. If necessary, add the material.
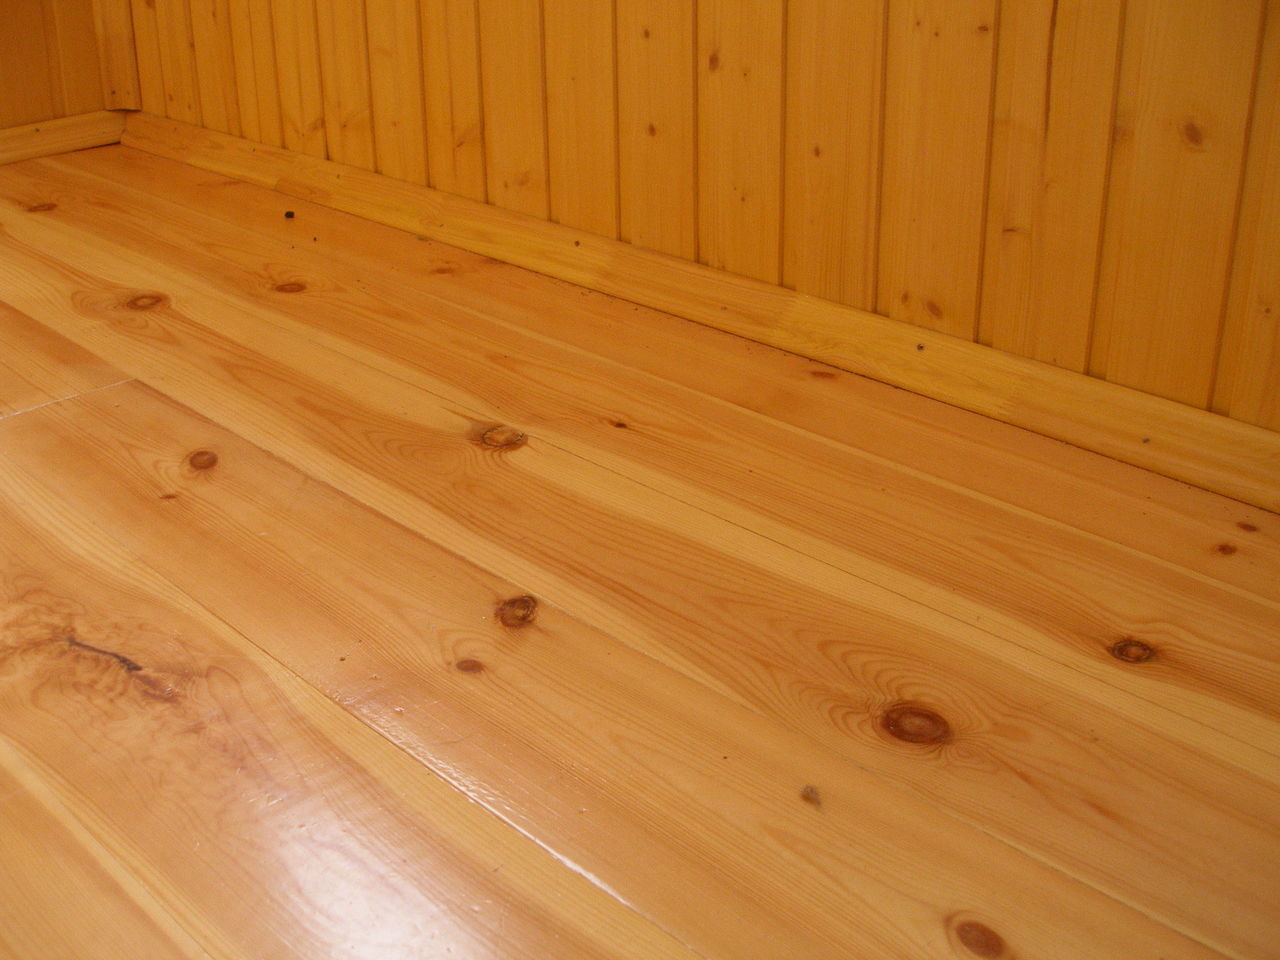
Plank flooring

It is better to use planks with interlocks as flooring. All elements are impregnated with antiseptics before laying. This is done especially carefully from the back and along the ends, because after laying it will not work to get to these places.
Installation is carried out in the following sequence:
- The first element is laid with a groove to the wall with an indent from it by 1 cm. We fix it to the logs with screws or nails.
- Insert the spike of the next floorboard into the groove of the previous one and press firmly. We also fix to lags.
- We put all the following elements in the same way. We cut the last board to the required size and also lay it.
- If two boards are used in one row, then the place of their joint should fall exactly in the middle of the log.
- Installing a wooden plinth.
For a long time, the renovation of the apartment was limited to the arrangement of the interiors, decorated according to all design canons. However, the constant desire of a person to increase living space and increase its comfort has become the reason for the implementation of extensive repairs, including mandatory positions for the arrangement of technical premises. One of these rooms is a balcony. If earlier you could not get on the balcony barefoot, as dust and dirt fell into the living room, then after repairing it, you will forget for a long time about the need to look for your own slippers. And from now on, you will not have to think about warm clothes, which previously helped you to be prepared for all the surprises of the weather outside the window. If, by opening the door to the balcony or loggia, you want to get into a cozy room, which is an extension of your apartment, and not on the "street", as it was before, you need to read our article, which tells how to lay the floor on the balcony do it yourself. But, despite the fact that the balcony, converted into a room for year-round use, is often glazed, the floor on the balcony sooner or later becomes unusable, due to the influence of temperature extremes and variable humidity. Even if, at first glance, it seems that there will be enough partial repairs, do not flatter yourself, since, according to experts, the best option is to completely dismantle the old floor with the subsequent installation of a new wooden covering. Having given preference to this option, you can be sure that it is the most reliable and durable, and also does not require special professional skills.
The need to equip an insulated floor on the balcony: the relevance of the issue
Residents of modern new buildings, which are not distinguished by an excess of free space and rational planning, strive for the most practical use of each meter of free space. Taking into account the fact that in modern apartments every square centimeter is worth its weight in gold, an increasing number of owners of apartments with a balcony decide on the need for its year-round use. Being true rationalizers and pragmatic lovers of logical solutions, they often equip a children's play area, a study or a winter garden on the balcony, which will become a “living” decoration of the apartment interior.

As for the problem of arranging a heated area on the balcony, it can be solved very simply. To do this, it is enough to glaze the balcony or loggia and carry out the installation of a warm floor on the balcony with your own hands, which can be done in several ways, each of which is described in the article. How to install the floor on the balcony with your own hands, and what technology to give preference to its insulation - let's figure it out further.

Options for arranging the floor on the loggia and balcony: choice of materials
In the process of arranging the floor on the loggia, it is important to decide not only on the structure of the materials used, but also on its temperature parameters, since there are several types of floor, among which are cold, insulated and warm. In this regard, we list the main options for installing the floor on balconies and loggias:
- Arrangement of the floor, which implies leveling it with a traditional cement screed without the use of thermal insulation materials;
- Floor mounting option, similar to the previous one, but involving the use of insulation (extruded polystyrene foam, expanded clay, etc.);
- Leveling the floor with a semi-dry screed without the use of insulation;
- Arrangement of the floor on the balcony using a semi-dry screed and insulation;
- Installation of a wooden floor on logs with or without thermal insulation material;
- Laying a wooden floor on a balcony with or without insulation, followed by laying linoleum, laminate or other floor coverings;
- Laying of extruded polystyrene foam followed by OSB flooring without arranging a log;
- Installation of a concrete screed, followed by laying ceramic tiles, linoleum or laminate;
- Installation of the "warm floor" system, for the arrangement of which various heaters are used, while the system is mounted according to several principles and can be either water or electric.

The choice of materials for the floor on the balcony - one of the most crucial stages of its arrangement, competently approaching which, you can avoid subsequent disappointment. The material chosen for arranging the floor on the balcony must meet a number of specific requirements, among which the leading positions are given to reliability, durability and decorative characteristics. Due to the fact that modern manufacturers offer a wide selection of materials for arranging the floor, in the process of choosing them there should be no difficulties even for ordinary people who first appeared on the construction site.
An important parameter that determines the choice of material for arranging the floor is the type of balcony. If you plan to equip an open balcony or loggia, it is recommended to use tiles for laying the floor, and if you dream of a warm glazed balcony, give preference to a wooden covering. However, this is not a dogma, and you always have the right to make a decision yourself.

Ceramic tile floor on the balcony: the order of work
The durability of ceramic tiles, as well as its operational and decorative characteristics, are beyond doubt, however, this material also has its drawbacks, in particular, it concerns its cold surface. In order to install the tile floor, follow the algorithm below.
- First of all, the surface to be mounted is cleaned and a waterproofing film is laid;
- Focusing on the height of the surface that they plan to equip, they choose an insulation of the required thickness, which is laid on top of the waterproofing materials;
- Having performed the previously listed steps, they install a cement screed, after which they dry ceramic tiles;
- To ensure a neat appearance of the floor, the craftsmen recommend using a special cross when laying ceramic tiles. After final drying of the concrete screed, grout the joints.

All of the above methods have the right to exist, but it makes no sense to describe each of them, since in practice only some options for arranging the floor on the balcony are used, which will be described below.
Do-it-yourself balcony floor photo


Based on the fact that there are three types of cement screed - dry, semi-dry and normal, before you start leveling the floor with a cement screed, you must decide what type of cement screed you plan to make. At the moment, it makes no sense to dwell in detail on the description of the mixture preparation process, however, it is advisable to consider the main provisions. Regardless of what kind of screed you will prepare, the process of leveling the floor using this method involves priming the floor and installing beacons, carried out on a thick cement mortar using a building level. The quality of any of the three screeds depends on the quality of the installation of beacons. If you plan to install an insulated floor, before installing the lighthouses, you need to fill in expanded clay or lay extruded polystyrene foam. Thanks to this technique, you will facilitate the process of installing beacons.

For the manufacture of conventional cement screed
you will need to prepare a cement-sand mixture, the composition of which depends on the brand of cement. If you are working with 400 grade cement, one part of the cement will require four parts of sand. If you are not sure about the quality of the sand, experts recommend preparing a cement-sand mixture at the rate of 1/3.
Working mixture preparation for semi-dry screed
is carried out in a similar way, however, it is necessary to add half as much water to it. Make sure the mixture is thoroughly mixed before adding water to the solution. As for the readiness of the mixture, it can be determined by clenching it in a fist. If, during the compression process, the mixture resembles snow in structure, it is ready. The mixture for the installation of a semi-dry screed is unloaded with a shovel and tamped, pulling the excess along the beacons in the same way as in the case of installing a conventional screed.

The structure of a semi-dry and dry screed is prone to the appearance of irregularities and cracks, which must be filled with a mixture and grout them using a special float or half-trowel. In order to avoid cracking of the screed, the next day after pouring it must be rubbed with a float or a half-trowel.
Important! When mixing the solution, make sure that the mixture is not too sparse, since a screed made on the basis of such a solution will surely crack after drying. The optimal consistency of a conventional screed is one that resembles mashed potatoes. In addition, if you are pouring too rare a screed on an expanded clay pillow, constantly floating expanded clay will interfere with work.
Dry screed installation
- a process, the principle of which differs from the previous two, since it involves the laying of fiber cement and gypsum fiber boards. Plates are laid on a pre-prepared expanded clay pillow or extruded polystyrene foam, after which their joints are carefully glued. The joints of the plates are also fixed with self-tapping screws every 15-20 cm.

Important! The thickness of the expanded clay pillow should not be less than 3 cm, as otherwise the screed on the balcony will be cold.
DIY wooden balcony floor: step by step guide
Lumber preparation
To provide a wooden floor with a long service life, it is necessary to treat the timber used as elements of the flooring with an antiseptic. After processing, dry the material and repeat the procedure again, also waiting for the wood to dry completely. Due to the fact that many outlets offer sawn timber that is deliberately treated with an antiseptic and thoroughly dried, this stage of work can be skipped if you purchase wood that was originally treated with antiseptic impregnations. In this case, you will, of course, save time, which cannot be said about the money spent.

Surface preparation
Experts recommend installing a wooden floor on a concrete base, which necessitates a complete dismantling of the old coating, regardless of its initial state. After you have dismantled the previous floor covering, start cleaning the room in which you are carrying out repair work. In the process of cleaning, you can use a brush or broom, and at the final stage - a vacuum cleaner. Then plaster or, using polyurethane foam, seal up all existing cracks and crevices. When doing this, pay particular attention to the joints between the panels.

Heat-reflecting canvas: the need for styling
To produce high-quality floor insulation, it is necessary to ensure that the surfaces of the walls, floor and ceiling do not let heat out. This function is easily handled by a heat-reflecting film covering the described surfaces. To optimize this physical process, the sheet of heat-reflecting material should exceed the width of the floor surface by 40-50 cm. This is necessary so that after laying the edges of the heat-reflecting film go onto the walls by 20-25 cm on each side. The same rule applies to the length of the sheet of heat-reflecting material.
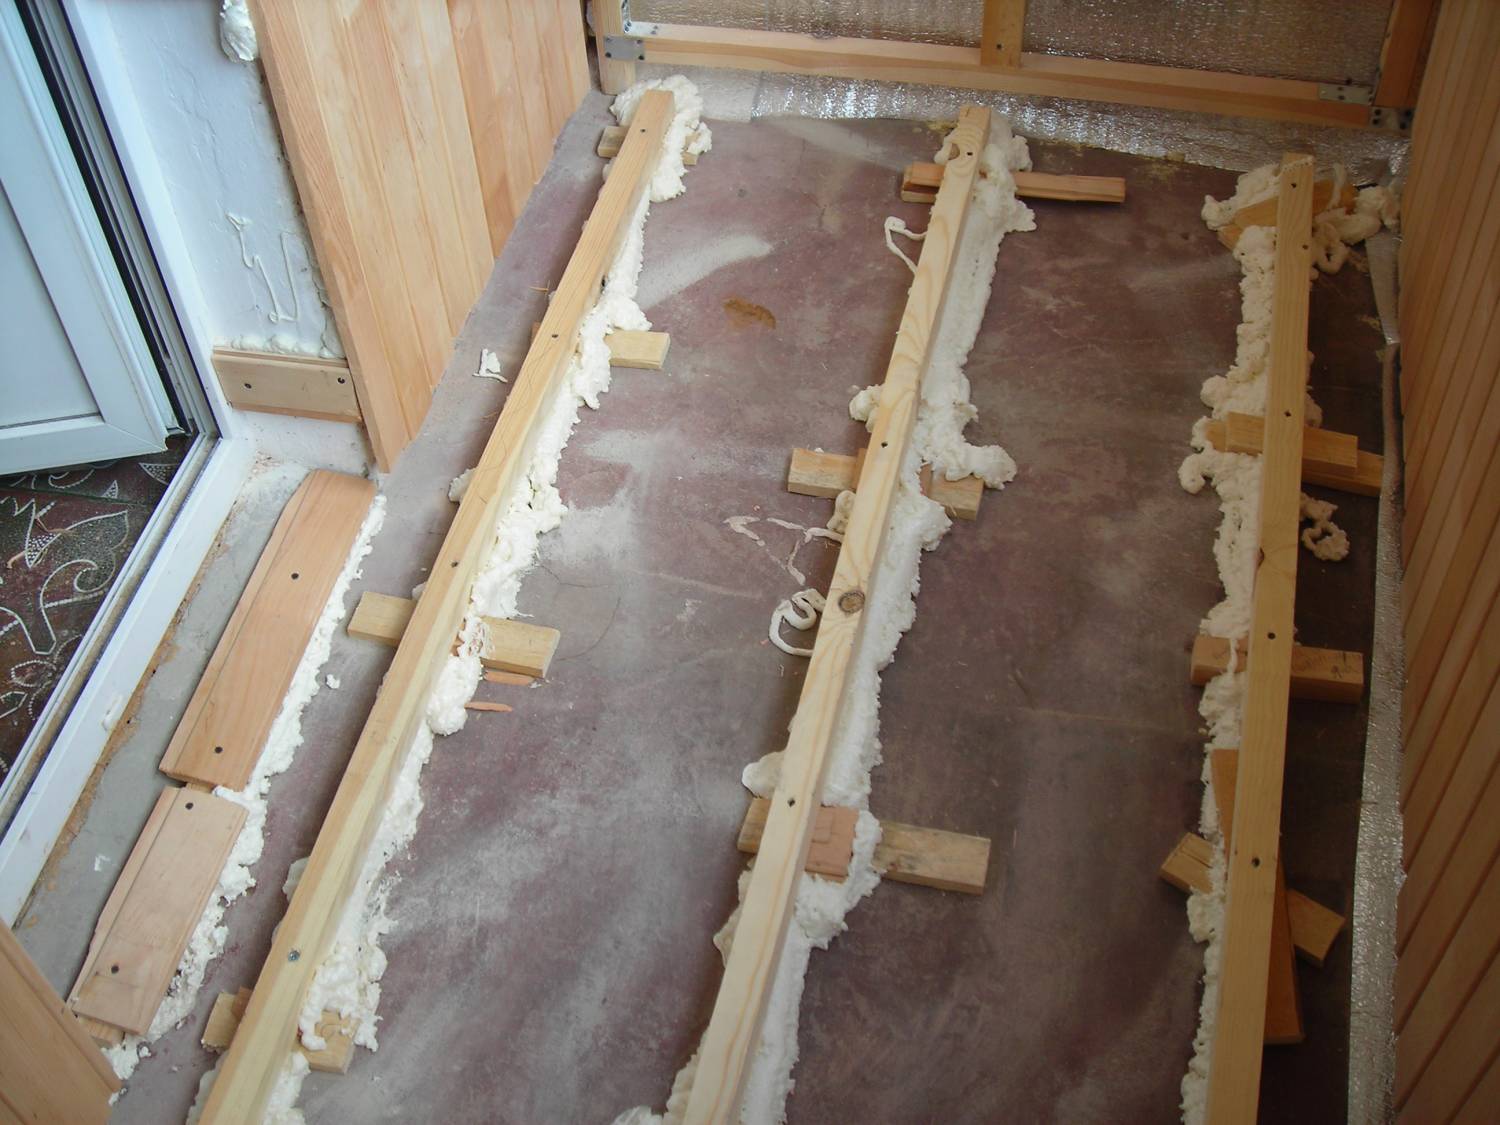
Transverse joists are floor structural elements that are attached directly to the base of the floor. The lags are located in increments of 40-50 cm and are attached to the base of the floor using dowel-nails and anchors. A timber is used as a lag, the length of which should be less than the width of the repaired floor by 2-2.5 cm, which will prevent the edges of the timber from touching the walls. In this case, the step of fastening the lag is from 5 to 6 cm.

The next stage of floor installation involves the installation of logs from a more massive board, which are mounted over the transverse logs. Fastening the main logs is the installation stage, at which the wooden floor is aligned in the horizontal plane. Placing the beams is carried out in several rows, along the entire length of the balcony, while the distance between the logs is 4.5 - 5 cm. To make sure that the main logs are at the same level, using the mounting level, check the installation of each beam.
Important! If you notice a discrepancy in the level of the fixed logs, place a piece of wood of the required height under them and fasten the main beam to the transverse one directly through this piece of wood.

The next stage is floor insulation... How to insulate the floor on the balcony with your own hands, and what insulation options exist at the moment - we will tell you a little later, but for now we note that if you prefer insulating materials, experts recommend using soft types of insulation, for example, mineral wool, which can be cut with clerical with a knife.
Laying solid boards - the final stage
A massive board must be cut to size and laid on the base, while not forgetting to saw off a spike from the first board. A mandatory measure at this stage is the alignment of the board at 90 degrees relative to the inner and outer walls (experts recommend focusing on both walls). To do this job well, you need a building ruler. When laying the first board, remember that all three of its edges should touch the walls, and the gap between them and the board should be 1-1.5 cm. The board is fastened using self-tapping screws that are screwed at an angle of 45 degrees into the groove. At the same time, remember that the first and last boards are also fixed near the wall.

Securing the second and subsequent boards involves inserting a tenon into the groove of the previous board. After completing this procedure, a shock block is prepared, made of board trimming, with the help of which the newly installed board is knocked close to the previous one and fixed with self-tapping screws.
How to insulate the floor on the balcony: possible options
Do-it-yourself insulation and finishing of the floor on the balcony is a stage of work that can be implemented in two ways:
- Through the use of thermal insulation materials;
- By arranging the "warm floor" system.

The use of thermal insulation materials
Consider the most popular types of insulation used for arranging a warm floor:
- Mineral wool - a porous material resembling classic cotton wool in its structure. For the production of mineral wool, basalt or fiberglass is used, which has gone through several processing stages: melting, drawing, cooling and crushing. When laying this material, it is necessary to take care of effective vapor barrier, since excess moisture can reduce the thermal insulation properties of mineral wool;

- Styrofoam - a material that has earned its popularity due to its low cost and high-quality thermal insulation characteristics. The manufacturer produces polystyrene in the form of plates with a thickness of 2 to 10 cm. The foam is placed between the floor logs, all existing cracks are poured with polyurethane foam, after which the final coating is laid;
- Penofol - insulation of a new generation, for the manufacture of which foil and foamed polyethylene are used. Being the brainchild of modern technologies, penofol has not only heat-insulating, but also hydro- and sound-insulating properties. The manufacturer suggests paying attention to one-sided foam foil, characterized by the presence of foil on only one side, and double-sided, where the foil is located on both sides.
- Penoplex or extruded polystyrene foam is the "benchmark" among thermal insulation materials. But its advantages are not limited to this, since this material is also characterized by low vapor permeability, ease and convenience in work, as well as inertness to the effects of all chemicals. Its only drawback is its relatively high cost.

Installation of the "warm floor" system basic options and their brief description
Arranging the "warm floor" system, you can go in several ways:
- Do-it-yourself installation of water floors on the balcony;
- Choose the most common technology for arranging a "warm floor" and install a cable heating system;

Important! Advantages of arranging a cable heating system:
Low power consumption;
Reliability and durability of the system due to the location of the heating conductor in the layer of insulating material, which prevents its oxidation. In addition, the cable is protected with a cement-sand screed and a floor covering;
You can regulate the system.
- Install the "warm floor" system using heating mats, which are single-core and double-core heating cables, which are attached to a special mesh in the form of a snake.

Important!Benefits of laying heating mats:
- Using high-quality heating mats, you will equip a warm floor that is safe for human health;
- In this case, there is no dramatic increase in the floor thickness (together with the tiles, this indicator does not exceed 1.7 cm);
- If the room in which you are installing the warm floor has a complex configuration, you can cut the heating mats into pieces of the desired shape, while maintaining the integrity of the cable.

- You can also equip a film infrared warm floor on the balcony with your own hands, which is an alternative solution to the issue.
Important!
The advantages of arranging a film warm floor are:
- Low energy consumption;
- Ease of installation and the ability to quickly put the system into operation;
- Floor heating is carried out within 10-30 minutes;
- Formation of the minimum electromagnetic field during the operation of the system;
- Slight increase in floor height;
- System safety during operation
Do-it-yourself balcony floors video
If it is necessary to repair the floor on the balcony, and you do not know or cannot decide how to level and finish the surface of the balcony or loggia, then do not rush to call the master, because even a beginner can do this amount of work, while there is an opportunity to save.
Follow the step-by-step instructions in this article, and you will see that this type of work is very simple and does not require extra skills.
What material to choose depends on whether the balcony is glazed, insulated or completely open. For each option, the material is selected individually.
For a glazed non-insulated balcony
If your balcony is glazed, but does not have heating systems and these are not planned in the future, then moisture-resistant materials must be selected. Despite the fact that the balcony is closed from precipitation, condensation will form evenly during temperature drops.
In this case, the following types of materials are suitable for alignment:
- moisture resistant plywood;
- drywall;
- gypsum fiber sheet (GVL);
- cement-bonded particle board (DSP);
- oriented strand board (OSB).
- moisture resistant laminate;
- tile;
- linoleum;
- carpet.
For an open balcony
The most difficult case when choosing materials is due to the constant rainfall and low temperatures in winter.
In this case, the following materials are suitable:
- oriented strand board (OSB);
- cement-bonded particle board (DSP).
Finishing materials:
- terrace board;
- porcelain stoneware;
- ceramic tile.
Note!
Do not overload the balcony slab. If you plan to raise the floor by more than 5 cm, it is better to use light materials and structures such as wooden beams (lag) or dry screed instead of cement.
For a glazed and insulated balcony
If your balcony or loggia is glazed, has or will have in the future a radiator, underfloor heating system or one of the existing permanent heating systems, then you can use the materials that are used for leveling and finishing the premises in the apartment.
Sub-floor and leveling methods
The most popular and common methods of leveling and creating a sub-floor on a balcony or loggia are described below.
Cement strainer

A cement screed can be made provided that the layer is from 3 to 5 cm. If the height of the floor screed on the balcony is less than 3 cm, there is a possibility of cracks, and if it is more than 5 cm, then there is a large load on the balcony slab.
How to level the floor using a cement screed with your own hands:
The balcony area in this example is 3.7 square meters. To obtain a screed 3-4 cm high, 6 bags of 40 kg of sand-concrete were needed.
The solution is mixed with a perforator with a mixer attachment.
- We clean the surface from dust and debris.
- The first step is to make the beacons from the solution using a trowel or other convenient tool.
It is necessary to put a hard surface on the lighthouses (pieces of drywall, ceramic tiles or other similar material at hand).
Further, using the building level, we make beacons of the same level with each other and leave to dry for a day. This is necessary in order to align one beacon horizontally relative to the other. Thanks to this action, the floor on the loggia or balcony will ultimately be flat.
In this example, the beacons are at a distance of about 90 cm from each other, since a level was used with a length of one meter.


- After the lighthouses have dried, we connect them with a solution to each other using a trowel and level this solution horizontally using a rule. Thus, the lighthouse lines were obtained. Leave to dry again for a day.


- Next, we distribute the solution between the soft lines and, as a rule, level the entire surface. Where the solution managed to harden, but it turned out not evenly, then you can moisten the surface with water in this place for better alignment. Where the solution was not enough, it must be added and aligned with the rule. The main thing is that in the end, the floor of the balcony is flat.


- On the third day, using a spatula, carefully take out pieces of material from the lighthouses, and seal the recesses remaining after them with a solution and equalize with a trowel and rules. It remains to wait until it dries completely and you can start finishing the floor on the balcony. The screed dries approximately 25 days (7 days for every 10 mm layer).

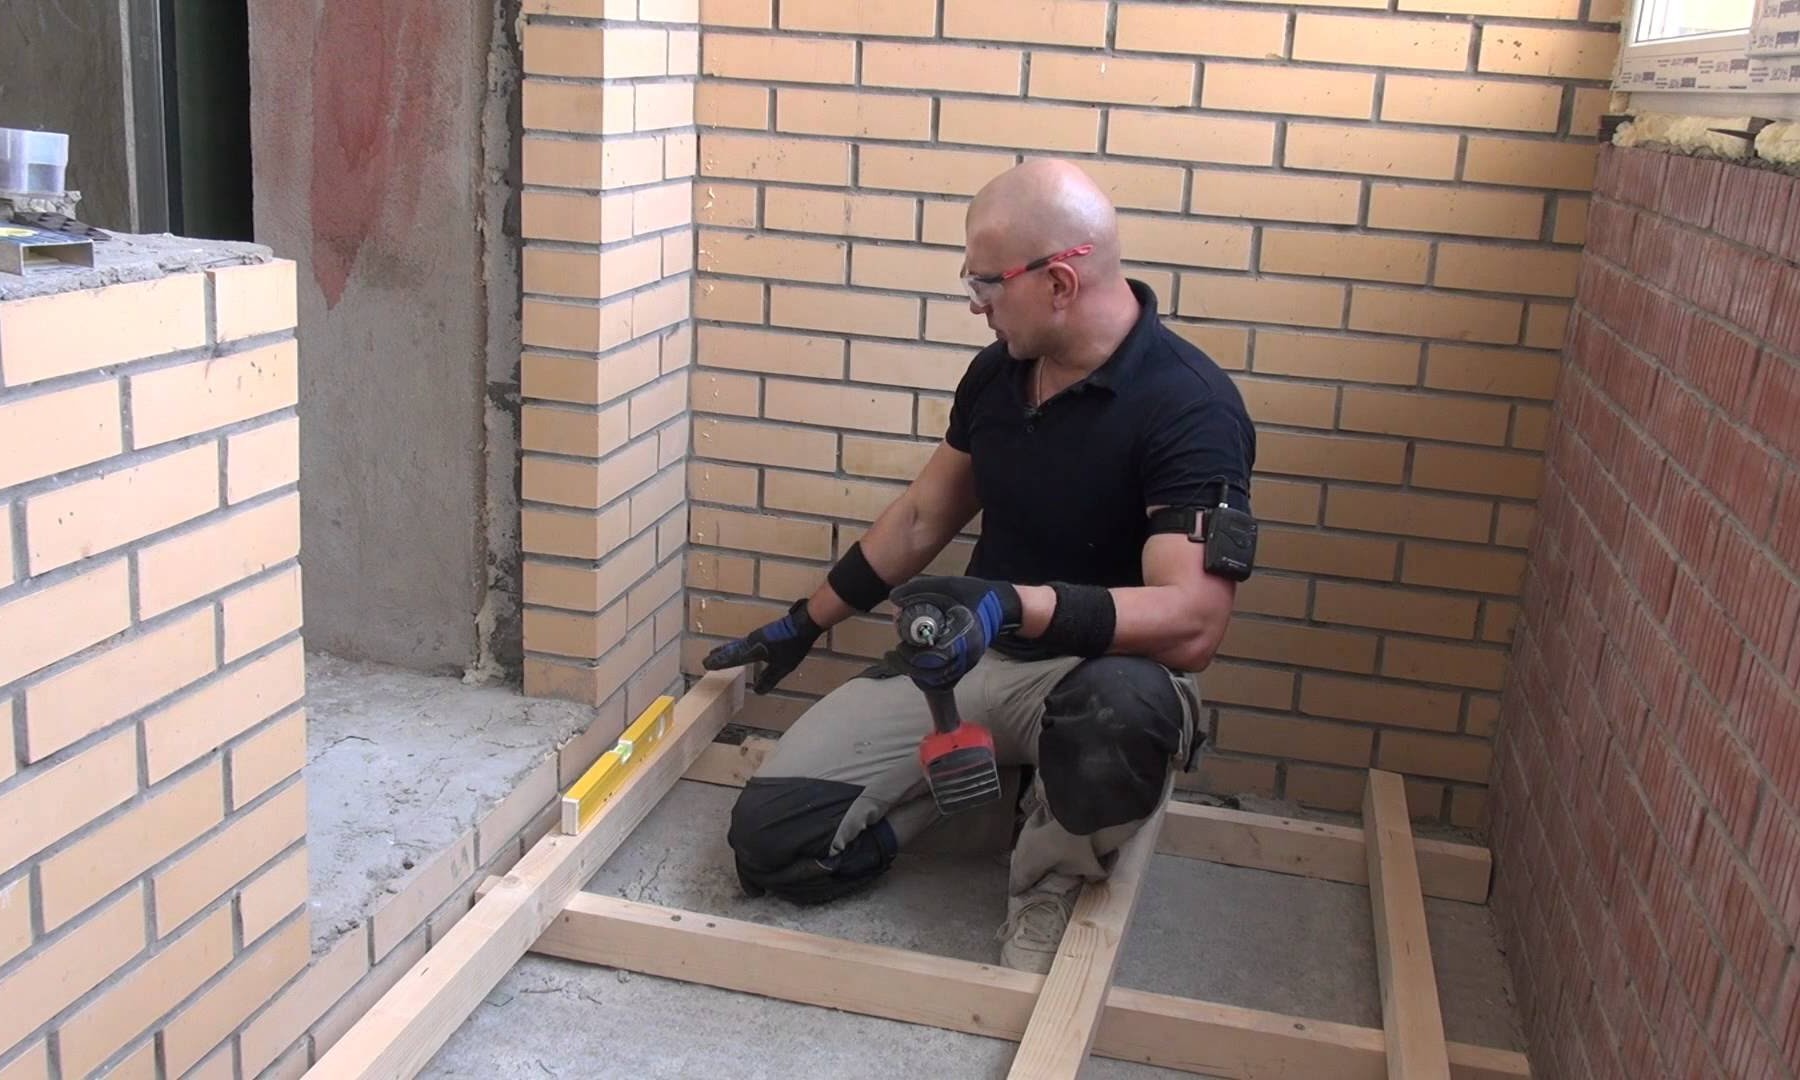
Rough floor on logs
First you need to determine to what height the floor will rise. It is worth considering that sheets of insulation are usually installed under the logs.
For safety, the distance from the future finished floor to the window sill should not be 1-1.1 meters.
In this example, a bar with a cross section of 50 by 70 mm is used.
Instructions:
- We cut the timber to the width of the balcony or loggia. Above accuracy is not required, you can safely cut the timber in this way: the width of the balcony is -2 cm.

- Lay the cut bars on the floor. The distance between the crossbars is not less than 40 cm and not more than 60 cm.

- On each beam we make two holes of the attachment points in half. The distance between the holes must be at least 80 cm.

- After all the cross-sections are drilled, it is necessary to drill concrete through the timber.

- Then anchors are inserted into the holes through the beam and tightened. The depth of the hole must exceed the length of the fastener by 2-3 cm, otherwise it will not be possible to insert it entirely.

Note!
Anchors are matched to the width of the balcony slab. Be very careful about this issue so that while drilling holes for anchors, you do not surprise your neighbors from below in the form of a hole in their ceiling.
- At the next stage, longitudinal logs must be laid on the fixed cross-sections. The distance between the longitudinal logs should not exceed 45 cm. For most loggias and balconies, it is enough to put 2-3 logs. From the wall of the room, the lag can be moved up to 10 cm, and from the wall of the parapet up to 20 cm.

- After the longitudinal logs have been laid with the help of a level, it is necessary to find the highest point and from it start attaching the log to the cross-section, while the central beam can be put on its side for now, and the high point is located along the extreme logs.
After fixing the beam at the highest section, we fix the same log to the diameters in the remaining places.
In places where it is necessary to raise the log according to the level, we put mounting wedges on both sides and fix it with a self-tapping screw. If the width of the longitudinal log is 7 cm, then the self-tapping screw must be taken 1-2 cm more or the 7-centimeter self-tapping screw should be slightly drowned in the log during installation.


- After one of the beams has been leveled and secured from it, the opposite lag is leveled and fixed with a level. It is important to align the extreme lags with each other, and not from the central to the extreme ones. If the width of the balcony or loggia is small, the central log may not be.

- When the extreme bars are set in level, now it is necessary to adjust the central bar to their level using wedges as well and secure with self-tapping screws.

- Further, if desired, the gap between the wooden lathing and the balcony floor is insulated with a mineral veil.

- After the cotton wool has been laid, all our structure must be covered with sheets of plywood or chipboard. The plywood will be screwed to the timber with self-tapping screws, and in order not to miss it later, it is necessary to project the center of the timber onto the wall by placing a mark with a pencil.

- Next, we fasten the chipboard or plywood to the timber with 41 mm self-tapping screws, focusing on the visible center and the mark on the wall.

Note!
The correct subfloor should bend between the joists by 2-3 mm with a load of 80 kg.

In addition to the text version of the instructions, we recommend that you read the instructions in the video format, which shows the installation in a more detailed form with an explanation of the nuances.
Dry screed
Step-by-step instruction:
Floor preparation. It is necessary to clean the floor of debris and fill up the cracks, if any, with polyurethane foam.


Soundproofing. Sounds are mainly transmitted over hard parts and parts. To prevent sound from the walls from being transmitted to the floor, it is necessary to leave a gap between the dry screed and the walls. Around the entire perimeter of the balcony or loggia, we lay a soundproofing tape made of foamed polyethylene. In addition to soundproofing, such a gap will not allow the clean floor to warp as it expands from heat.

Waterproofing. A vapor and moisture insulating layer of polyethylene film with a thickness of 80 microns is laid on the base of the floor. Along the edge of the walls, the film should rise above the level of the future floor by about 6-10 cm. The edges of the film are fastened with masking tape or tape.


The first layer of expanded clay is laid. Fraction from 1 to 5 mm. In this case, the floor rises by 17 cm. Since the expanded clay layer must be at least 3 cm and no more than 7 cm, we will make 2 layers of expanded clay and one intermediate layer of gypsum-particle board.

Installation of guides along long walls in level. Aluminum rules 2 cm thick serve as guides.

 Align the surface between the guides using a rule. It can be made independently of the desired size from scrap materials, for example, from plywood or chipboard. In order to move along expanded clay and not spoil the finished surface, we put small pieces of plywood, chipboard or GSP.


We remove the guides, and smooth out the remaining irregularities. The first layer of expanded clay is ready.

The thickness of the first layer of expanded clay was 7 cm. If it was necessary to raise the floor by 9 cm, then you can close the GSP screed and on this the subfloor on the balcony or loggia is ready. In this case, it is necessary to raise the floor by 17 cm, and this requires one more layer of expanded clay, so the GSP will serve as an intermediate layer.


We proceed to laying the intermediate layer of GSP.


We proceed to laying the second layer of expanded clay. We pour expanded clay into the installation sites of the guides. The guides are aligned in the same way as when leveling the first layer.


We fill in the space between the expanded clay guides and level the surface in the same way as the first layer.


The screed must be closed. Cut out the elements from the GSP. We put the first element and press it tightly against the wall. So that there is no gap between the plates, we glue the joints and report the rest of the elements. We fasten the joints with self-tapping screws every 5-10 cm.


After installing the floor elements made of GSP, it is necessary to cut off the excess edging tape and film.


The floor is ready. Any kind of covering can be laid on such a floor - linoleum, carpet, laminate or tiles.

In addition to the text version of the instructions, we recommend that you read the instructions in the video format, which shows the installation in a more detailed form with an explanation of the nuances.
Bulk method
Step-by-step instruction:

Drying period for self-leveling floor on the balcony is 1-3 days, depending on temperature conditions and layer thickness.
Finishing instructions
Below are step-by-step instructions for finishing the floor on a balcony or loggia with your own hands with the most popular materials.
Laminate

- The first step is to measure the distance between the walls of the balcony and mark the required distance on the laminate sheets.
Make a small gap between the wall and the floor. This is done when the size of the laminate changes due to moisture and temperature extremes. Cut the laminate at right angles, otherwise it will not be possible to lay the lamellas evenly along the walls. In this case, an electric jigsaw is used to cut the laminate.
You need to cut at a low speed in order to avoid the appearance of chipping, and when approaching the edge, the jigsaw must be led even more slowly to avoid chips.


- The next step is to lay the substrate on the surface of chipboard or plywood. The substrate is spread on the floor, free of construction debris.

- We fix the substrate to the wooden base using staples and a construction stapler. This is necessary so that the substrate does not fidget or move during the laying of the laminate. Alternatively, you can use double-sided tape.

- After fixing the substrate, we install the first piece of the laminate. In this example, one piece of laminate covers the entire surface of the balcony, as a result, the seams are located perpendicular to the long walls of the balcony.

There are other ways to lay laminate flooring: diagonally, longitudinal, herringbone or squares. In these cases, more finishing material will be required and there will be more undercuts. - Next, we move on to installing subsequent elements. The connection technology depends on the method of processing the ends of the products. In this example, there was a lock that snaps into place with a slight pressure on the lamella.

- Difficulties may arise in the area. At this point it is necessary to cut the lamella for the recess. We measure the length and width of the recess, transfer it to the lamella and cut it out.


- The last element of the laminate is laid after preliminary cutting. On the last lamella, the cut must be made along. It's okay if it turned out a little unevenly, since this area will be covered with a plinth, and small defects will not be noticeable.
- The floor is ready.


You can make a linoleum floor on a balcony or loggia with your own hands as follows:

We proceed to the installation of skirting boards. They hold the linoleum in place and prevent the canvas from shifting during operation.
- Remove the protective strip from the plinth that covers the cable channel.
- We attach the plinth to the wall and use a punch through the plinth to make holes for fixing.
- We insert the dowels into the holes and fix the plinth with a screw or self-tapping screw.
- We put in place the strip that covers the cable channel.

Tile

This example shows a standard tiling method. Laying begins along the parapet from the far corner of the balcony slab.
First you need to make a markup, for this, attach the first row of tiles to the balcony slab and make markings with a pencil.
Sequencing:
- The surface is cleaned of dust and debris.
- We mix the adhesive according to the instructions on the package. The solution is mixed using a perforator with a mixer attachment.

- An adhesive composition is applied to a selected area up to 3 mm thick. At a time, no more than 1 square meter is prepared for laying. m. area on the floor so that the glue does not dry out. The surface is leveled and excess glue is removed with a notched trowel.

- We proceed to the installation of tiles. Glue is applied to the back of the tile and leveled with a notched trowel. Thickness up to 5 mm.

- We lay the tiles to the prepared area and press down with even force. We control everything by level.
- By analogy, the following tiles are laid. Plastic crosses are inserted between the tiles to make the seams even.
Porcelain stoneware tiles are laid seamlessly to give the flooring a complete look.

- We leave it to dry for a day, after which, if desired, you can seal the joints with grout.
Decking board for an open balcony

Preliminary work:
- Installation of the lathing. Before installation, it is necessary to treat all wooden products with linseed oil or an antiseptic.
- The next step is to cut the bars to size.
- Next, we lay out the bars on the surface of the balcony slab and level them horizontally so that they all converge in one plane. If necessary, the bars are lifted on plastic or wooden supports.
- The lag is fastened with anchors or dowels with self-tapping screws.
- For a closed balcony, you can lay insulation between the logs and cover it with a foil and then install the terrace board.
- To get used to it, the terrace board is laid out on the balcony and left for 2-3 days. During this time, the coating will acclimatize and will be completely ready for installation.
Installation of a terrace board on the floor of an open balcony:

- We lay the first element along the wall and fix it with self-tapping screws into the pre-countersunk holes;
- Installation of hidden fasteners for decking. It is installed on a bar in the groove of the board and is fixed with a self-tapping screw. Fasteners are mounted on each log;
- The following panels are attached in a similar way.
- When joining the end sides, the joints should be on the logs and fixed with mounting clips;
- The outer board is fixed to the logs with self-tapping screws, just like the first;

During installation, it is necessary to leave a gap between the wall and the floor covering. The tree has the property of expanding and closely placed slabs begin to interfere with each other, warp and swell, pulling out the fasteners.
The wooden floor on the balcony makes its design unique and opens up a lot of technical possibilities. For example, to install a warm floor.
In this article we will show you how to properly lay a wood floor and complete all the preparatory work.
In fact, many can lay the floor with boards, if you choose the right wood and take measures against atmospheric factors on the balcony.
Do you want reliable beautiful floors, but do not know how to quickly and efficiently make a wooden floor on a balcony or loggia with your own hands? Take advantage of our recommendations.
Below you will see the prices from the Moscow manufacturer company ":


