Website sections
Editor's Choice:
- Laying ceramic tiles on plywood
- The technology of cutting the log house into the bowl - all stages
- Independent manufacture of interior doors
- Rules for grinding cylindrical logs Grinding log ends
- DIY wardrobe
- How to age a tree - the best tips with video How to make artificial aging of wood
- Recommendations for calculating the beam on the house
- Shelves in the bath: height, size and material What should be the shelves in the steam room
- Table transformer do-it-yourself drawings - photos and video
- Making wooden stairs on a metal frame and on concrete marches with your own hands for a private house How to make a staircase with your own hands
Advertising
| How to cut log cabins. The technology of cutting the log house into the bowl - all stages |
|
A wooden house is an aesthetic, ecological and safe housing, which is distinguished by high heat and sound insulation properties, strength and reliability. Many are interested in whether it is possible to assemble and install a log house with your own hands. Make it real, but difficult. When installing, it is important to take into account a lot of factors, including the quality of the log, lumber calculations and the layout of the house, installation features, etc. Please note that poor-quality materials and assembly errors will reduce the performance and life of the house, lead to the appearance of rot and mold in the structure, skewed walls and many other, no less serious problems. But if you decide to independently build a country house or bath, this article will tell you how to make a log house. Design and material selectionDo-it-yourself felling begins with the design of the house, taking into account the characteristics of the land, future engineering systems and room design. The layout of the log house can be rectangular or square, as well as curly in the form of a semicircle, hexagon, etc. Of course, the construction of the first option will be much easier. After creating the project and calculating the estimates, lumber is carefully selected. Round logs are the best option for those who want to assemble a log house and build a house on their own.
Such logs are characterized by a smooth and even surface, the same dimensions and diameters. This will make installation quick and easy. In addition, logs that are closely adjacent to each other will provide good thermal insulation. Due to the aesthetics and naturalness of the materials, the round wood house will harmoniously fit into the environment. The wooden structure will look elegant and original. Read more about the benefits of a log home. To get a reliable and durable house, you need to use only high-quality logs. It is desirable that the lumber be from forest regions and undergo special processing. In the company “Marisrub” logging takes place in the Kirov region, the republics of Mari El and Komi. These regions are famous for good, large and damp-resistant wood. Raw materials and logs are carefully selected and processed in the company's own workshop. The tree is impregnated and treated with protective agents against the negative effects of moisture and insects. Such materials will last longer and retain their original appearance and properties. Choose logs harvested from the winter forest. Since such wood is more strong and resistant to moisture. On lumber, small diameter knots and a small natural defect are allowed. Trunks of quality materials are characterized by yellow or dark yellow colors. It should be untwisted logs of the same diameter and one tree species. There should be no mechanical damage, rot or wormholes on the surface. How to bandage a blockhouseAfter the materials are selected, and the foundation for the wooden house is installed, proceed to the assembly of the log house. The fastening or ligation of logs is of two main types. It is “in the bowl” and “in the paw”. Both methods characterize the stability and strength of the structure of the future home, and they differ in the creation of grooves. Chopping “into the bowl” or “into the cloud” is the traditional Russian method of assembling a log house. He suggests that the corners of the structure are connected with the release of the ends with a length of two log diameters. Because of this, the cost of lumber increases. The construction of such a house will cost more, but the heat inside will remain for a long time. In addition, building angles will not be adversely affected by wind and rainfall.
The “paw” method assumes that the logs are placed in brackets, aligned on the outer edge and squeeze the excess from the inside. This is a colder room, therefore, for insulation, the ends are closed with boards. This is necessary in order to protect sawn wood from decay. Note that the log house “in the paw” must be squeezed inside.
Bandaging the logs “in the paw” has a more modern and aesthetic appearance and less waste wood. But to create a warm and durable home, you will need a lot of additional work. Therefore, such cutting will become a laborious process. Felling installation technology
The final stageAfter assembly, the log house is left for 0.5-1.5 years for shrinkage, while the structure is better to close with plastic wrap for waterproofing. During this period, you can sew up floors and install rafters for future roofing. Sew floors with boards with a thickness of 60 mm, which are laid on beams. Boards are connected using spikes. The ceiling can be laid in the same way. After installing the roof, they move on to finishing work. First of all, it is the insulation of the floor, ceiling and walls. Do not forget about engineering systems, including electricity and water, ventilation and sewage. These communications must be carried out before the start of the interior decoration. At the same time, the location and installation of these systems are calculated at the design stage of the house! Installation of a log house and the construction of a wooden house with your own hands is a complex and time-consuming process that requires knowledge and skills. Wrong sequence and technology of work, poor quality materials and lack of experience will lead to serious problems. Therefore, it is better to entrust the work to professionals! Masters of the MariSrub company will complete the construction of a wooden house, cottage or turnkey bath! We offer services for creating a project of your dream home, assembling and installing a log house, installing a foundation and roof, arranging communications and finishing the structure. The company has its own workshop for the production of logs and chopped logs. Independent production - a guarantee of careful quality control and low prices! Log house made of round timber is a classic solution used in construction for centuries. Round wood is chosen as a material for houses and baths, with the help of log cabins, summer houses and outbuildings are erected. Logs have high thermal insulation qualities, while retaining all the advantages of a natural material. It is difficult, but quite possible, to build the right log house from a round log with your own hands, however, it is important to deal with all the features of a wooden house.Features of log housesLog houses from roundwood do not lose their popularity, since this material allows for natural exchange and at the same time has very low thermal conductivity. In such houses there will be a comfortable temperature and at the same time a light pleasant atmosphere with the aroma of a tree that many people like. However, because of the round shape of the logs, the joints between them will need to be insulated. The log house of a round log can stand for a very long time, the best examples of wooden architecture cost hundreds of years. For the construction, several log options are used, and you need to decide on the most profitable of them:
Whichever option you choose, a round log house will be the most beautiful solution: log houses have excellent aesthetic qualities, their appearance reminds of Russian fairy tales. The surface of the walls will have to be subjected to a protective treatment, but it will preserve the natural color and texture of the tree, so the building will look great. Preparatory work before constructionHow to make a log house from round timber? Construction begins with the selection of suitable material and preparation of the project. The most popular in Russia are pine houses: it is inexpensive, grows in almost all regions, is easy to process. Soft material will require additional protection, but it can last quite a long time. A more expensive solution is a house made of larch logs: this type of wood does not decay, and it only gets stronger due to humidity. It is difficult to make a project yourself, especially if there is no experience in drawing drawings. However, you can find ready-made standard solutions and refine them in accordance with personal preferences. You can contact a specialized company, where a professional architect will develop a project that is most suitable for all requests.Stages of construction of a log houseWhen all the preparatory work is completed, you can begin to assemble the log house on the site. The owner must decide on the type of foundation of the house: if a major two-story building is being built, the tape shallow foundation should be the best solution, and for a light small construction, a columnar base will be suitable. The site is marked with pegs between which the ropes stretch, after which you can lay the foundation strictly according to the resulting lines.The strip foundation is a monolithic concrete strip, which is poured along the entire perimeter of the building. Concrete is reinforced with a reinforcing cage, so the tape base remains one of the most durable and reliable. After pouring the foundation, it needs to dry, it takes several weeks. Only after that it is possible to disassemble the formwork and proceed to the assembly of the log house. The foundation requires careful waterproofing: roofing material is laid in several layers on it, you can also use bitumen mastic. The log house itself is assembled in several stages:
Typically, for logs from round logs, the “into the bowl” type of logging is used: in logs, semicircular recesses are selected, with which the corners of the log are fastened. It is important that the bowls are as even as possible, then the wall will be reliable.
Today, there is great interest in the construction of wooden houses, including the old log house technology. This is due to the desire of people to live in an environmentally friendly housing. Log houses are popular due to their environmental friendliness. Meanwhile, to satisfy such a desire, one has to remember the architectural and construction secrets of the ancestors. There are quite a few of these secrets, and one of them is the knowledge of how to chop a log house into a bowl. In practice, there is nothing particularly complicated in mastering this technique, although carelessness and self-confidence are unacceptable here. It is necessary to carefully understand some of the subtleties and understand what a log house is in the bowl and what it is good for. Chopping the log house into the bowl: its pros and consThis method of constructing building frames brought the modern spirit of an old Russian home, reliable, enchanting with its folk style. In this technology, the connection of the times is very tangible, and today builders, who know how, like their colleagues hundreds of years ago, are actively building houses for permanent residence and the Russian baths that they love among people.
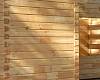
When a log is cut into the bowl, each upper log is placed in a semicircular recess, which is cut in the lower log lying perpendicularly. The essence of this angular connection of the processed logs is that each upper log is placed in a special semicircular notch cut out in the lower perpendicular log. The recess, which is called the bowl, is made of such a size that the top log after laying sufficiently tightly laid on the previous log of the wall. Thus, a continuous, without significant gaps, vertical overlap is created. The centuries-old experience of national construction and climatic features in a particular locality have had a definite impact on the development of this technology. A variant of the angular ligament of logs, when the upper log lays in the bowl, is called "Russian cabin" (or "round"). But there is also a reverse way of cutting down a blockhouse. It consists in the fact that the bowl is cut down in the upper log on its lower part and therefore lies on the lower log. This technique was called "Siberian cabin (or" in the hoop "). The emergence of such a technology was due to large, compared with the middle zone of Russia, problems with cold and precipitation in Siberia. Many experts believe that the Siberian version of logging protects the log house more reliably from all-penetrating moisture and frost. Choosing the option of chopping the felling in the way "into the bowl", the master assumes a certain responsibility for the result. Therefore, it is reasonable to know what advantages and disadvantages this technology is characterized by.
Marking and cutting down the log house “into the bowl”. A beautiful original house created by environmentally friendly building materials looks very harmonious and does not require additional external wall decoration. At the same time, the customer may have difficulties if he nevertheless decides to sheathe the blockhouse. This is a minus of this technology. Another drawback of the log house in the bowl is a rather high material consumption compared to other log house technologies. Due to the projecting angles of 50-60 cm, the builders lose the useful living space of the house. How to cut a log house into a bowl: materials and toolsFor a comfortable and productive cutting down of bowls you will need the following tools:
Which wood is better to use for the construction of a log house?In order to successfully cut a log house into a bowl, a good tool and the corresponding skill of a carpenter builder are not enough. It is necessary to determine the best material for this, which will resist infection by the fungus and attacks of bark beetles
Types of cuts “in the oops”. Carpenters recognize a pine as an almost ideal tree species for this. It is valued for a smooth, almost knotless trunk, characterized by a high degree of hardness. However, this fact does not interfere with the convenient processing, which is distinguished by pine. On the other hand, as an integral element of the building wall, it captivates with its reliability and durability, good resistance to decay and the absence of cracking as a result of drying. To cut the cabin confidently and quickly enough, it is recommended to select logs of approximately the same length and diameter. In this case, the most practical diameter according to the experience of using this technology is considered to be 22-24 cm. As for the time of harvesting logs for the future log house, experts advise doing this in the winter. It was at this time in the tree trunk contains the least juice. Therefore, during subsequent drying of winter wood, it will be minimally warped, destructive cracks will appear in the trunk. How to chop down: a sequence of operations
A good species of wood for the construction of a house from a log house is pine. The production of any log house, including in the bowl method, begins with the preparation of the site on which the house will be built. By the beginning of the installation of the first, lowermost layer of logs, the foundation of the future structure should be mounted in such a way that a strict horizontal starting salary is ensured. Before starting the construction of walls, it is necessary to put a layer of waterproofing material on the foundation. The device of the flange begins with the installation of two parallel to each other logs, which will subsequently become part of the long walls of the future building. Between them there should be a distance equal to the length of the planned log-cross. After the first logs take their strictly horizontal and parallel position, 2 perpendicular logs are placed on their edges. On the crossbars laid out in this way, the marking of the future recesses is made. This operation is carried out using the carpentry features. The contractor should very carefully note the semicircles on both logs at the same time, since only the perfect accuracy of calculations and marking provides the maximum density of contact of the logs to each other. At the same time, the depth of sampling of the bowl should guarantee such a landing of the upper log in the lower one, so that the upper trunk protrudes from the lower one to half its diameter. The markup is followed by the actual selection. It is produced with a chainsaw, ax and chisel. After removing the wood from the bowl, a test installation of the logs is done to fit them tightly to each other.
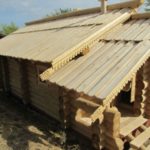
To create a snug fit of the logs in the vertical plane, a special groove is cut out on the upper edge of the lower logs. To create the most tight fit of the logs to each other in a vertical plane, a special groove for compaction is cut down on the upper edge of the lower logs along their entire length. Its thickness is influenced by the size of the logs, as well as the climate that prevails in the area where the building will stand. Usually it ranges from 120 mm to 200 mm. No gap should appear in perfectly selected sealing grooves. Nevertheless, despite such a technological requirement, for additional thermal insulation before installing each upper log, the groove of the lower log is laid with a heater. When installing logs in bowls, they are leveled with the help of special studs-pins, for which holes in the workpieces are pre-drilled to a depth equal to the height of one and a half logs. Laying the logs in this way, they are tapped with a wooden block. And all this time it is necessary to follow the strict verticality of the walls. The nuances of workTo cut down the log house and to be resistant to weather, the logs are oriented with thin annual rings to the street, and with thick rings - inside the future home. To facilitate this process, you can build a building in parts. Shifts (the so-called these parts) are usually connected on the earth, lining up by the size of human growth. Then each of them is disassembled and installed again on the base frame. The pile option will be the best choice for a foundation under a wooden blockhouse. It is lightweight and easy to install. In the absence of the necessary experience, the production of log cabins is recommended to start with the construction of something small and not very significant, for example, with a garden gazebo or a small bath. So experience will come and develop the skill necessary for the construction of a full-fledged house. Having gradually learned building wisdom, the master will be able to create something not only suitable for housing, but also provoking enthusiastic responses with his exquisite appearance. Wooden materials retain heat well, and are environmentally friendly, and also have an attractive appearance. Log house can be prepared with your own hands. Materials and tools for the performance of workTo harvest the log house, you need to take the following tools:
Consider what the various expressions in the carpenter’s language mean:
Logs can be processed below to secure the work in progress. The construction of the log house takes place in three stages: the main part is performed, and then the middle and upper. The entire length of the log can be of a different circle, so you need to change the top and the comet. If you make a edging, then the crowns will connect well, and do not form large gaps. The deck in the extreme part is squeezed on both sides to get a flat surface. Logging materialInitially, timber is harvested, after calculating the required number and size of logs, these figures depend on the width, height and length of the building. Therefore, before proceeding with this work, it is necessary to carry out a drawing of a building with clear dimensions, and calculate the amount of material. The preparation of the log house depends on the layout, type of fastening of the logs, and their processing. When carrying out the project, they note what form the building will be, that is, it can be standard, which consists of four walls. And it can have an unusual appearance, and include a larger number of load-bearing elements. Logs are attached in two ways: in the "bowl", and in the "paw", these types of construction of the grooves differ. In the first option, strong winds do not affect the corner parts of the structure, but more material is left in the dressing. With the second version of the material, less is needed, but the angular parts will be under the influence of a strong wind, and it is more difficult to complete the grooves. Construction can be made of cylindrical and profiled logs. In the first case, the log is processed to such an extent until it takes the form of a cylinder, special machines are used for this. Such material has a number of advantages: The profiled view of the bar on the cut has a rectangular or square shape, its processing is also performed using a machine. At the final stage, the side parts of the log will be flat, and special grooves for fastening are located above and below. Such material also has its advantages:
For the manufacture of logs, coniferous species of wood are used. After harvesting the logs, the bark is removed and dried. Initial workAccording to the drawing, marking is carried out on the territory, stakes are installed and the rope is pulled. Then, the foundation is made in the form of linings, with dimensions of 1 meter in length, and 1/3 meter in circumference. Their installation is carried out near the corner of the proposed building using the level, while the load will be uniform. Then they build a edging, choose where it will be located, and with this part upwards, they lay down, fix the log with brackets. Using a plumb line draw vertically, they will be the extreme parts of the edging. Pull the rope along the edges of the log, cuts are performed, and material is cut off until the edging is completely obtained. The same work is done on the opposite side of the log.
LoggingAfter the foundation is poured, it must be left to dry completely. A waterproofing material is laid on the completed foundation, roofing material can be used. From above, a board with a thickness of 5 centimeters is installed, on which the crown will be located. To keep the building warm, tow are laid on top. Then, the initial crown is laid, in which the logs should have a larger circumference compared to the rest of the material. Before starting this work, cuts of about 15 centimeters along the entire length are performed on the log. In this case, the material will fit snugly against the board. After that, lay the remaining crowns to the required height. A tow is placed between the elements of the crown, the logs are tied in the corner, spikes are also used for tight connection, they are placed at a distance of 1 meter. In this case, the building will have good stability. How to install the first window sill elementFirst, mark the doorway, then install the logs using a dowel. With the help of plumb lines, the vertical arrangement of the corner parts is checked, the final window sill is installed on two dowels. Then the crowns of the window element are laid, observing the opening height of up to 130 centimeters. After that, strapping is performed in the upper part. After that, the elements are prepared under the rafters, for this, the logs are cut off, and about two edgings are made on each of them. Elements cut into the deck, with a chisel, make recesses for the rafter legs. When making rafters, there should not be many small knots in the log. Near the base of the rafters, a spike is made using sawing, and pair laying is performed. How to install openings for doors and windows?Openings can be performed in two ways: after the work is completed, and during construction. In the first option, the installation of openings is performed after completion of all work, for this purpose, gaps are made in the crowns at the intended place. After laying, these openings are cut with a chainsaw. In the second version, the openings are performed during the laying of logs, for this special bars and grooves are used, this method takes a lot of time and money. Metal materials cannot be used as casing, since heat will pass through them. To install the pigs on the end parts of the logs, a vertical tenon 50 * 50 is made on each side. A pigtail is installed on it, a groove is located on its back side. Roof constructionFirst, the beams are laid on the wall trim. Beams are fixed, and the legs of the rafters are set at a distance of 1 meter. Near the ridge, an angular file is made for a tight connection. Boards are nailed to the legs of the rafters or a crate is made. Then lay the main roof covering according to the instructions for the selected material. The skate is covered with galvanization to protect it from strong winds and rainfall. After completing all the work, I proceed to the interior decoration, namely the construction of floors. Varieties of pillars and their layingPillars are:
They are arranged according to their names, the thickest elements are angular, the thinnest are intermediate. Corner posts are placed in a pocket, the depth of which is up to 7 centimeters. The remaining columns are set to a depth of about 3 centimeters. On the log house, up to three edges are performed, after shrinkage occurs, they proceed to laying the remaining posts. At the end, rafters are installed, for this use bridges, jibs and nails, as a mount. Elements are laid on the bridges, the upper part is fastened with nails. The spikes of the rafter elements are placed in pockets, fixed with jibs, and the legs are fixed with brackets. After completion of all work, the construction is left for 1 year for shrinkage. In order to prevent skewing of doors and windows, as well as material not being deformed, it is necessary to perform gaps that disappear with time. While shrinkage occurs, you can perform the construction of the floor or rafters for the roof. After shrinkage occurs, tow gaps fill all the gaps formed. Mandatory RulesWhen constructing buildings from a log house, the following rules must be followed:
In order to complete the construction from the log house, it is necessary to select the necessary processing of the log, prepare the material, build the foundation, put waterproofing material, boards on it, and the initial crown of the log house is laid on them. Then they proceed to the construction of the remaining crowns to the required height, after which openings for doors and windows are made, floors are made, and the building is left for shrinkage, after which the roof can be made. In order to prevent deformation of the material and openings, it is necessary to leave compensation gaps that fill the tow. With the right job, the building will be warm and durable. Wooden houses were built in Russia from ancient times and have not lost their popularity in our time. This is due to the unique properties of wood, a natural, environmentally friendly natural material. Almost all the masterpieces of Russian wooden architecture were built by our ancestors without a single nail cutting into the bowl. The name of the method is due to the type of connection of logs in a single construct. A semicircular recess in the form of a bowl was cut out in the lower log, into which the upper log was tightly placed at right angles. The result was a solid, beautiful, warm, not blown in corners design. Varieties of methodLog construction can be performed in the following ways:
Advantages of cutting the log house in the bowl with your own hands
When comparing that it is better to log in a paw or in a bowl, the choice of the second method of construction is preferable, this is confirmed by many years of experience in our national wooden architecture. disadvantagesThere can be no ideal designs, the following points can be attributed to the minuses of the considered construct:
Wood selectionConiferous species are preferred. Most often, pine is used, which is characterized by a smooth trunk of uniform thickness along almost the entire length, a minimum number of knots, and resistance to decay. The best is considered wood from the northern zones, felled in the winter. In winter, the movement of juices in the tree is minimal, which leads to less cracking of winter blanks during drying. The blanks should have the same overall dimensions, the recommended diameter is ≥ 22 cm. The larger, the better, this will reduce the number of nodal joints and increase the thermal performance inside the building. The material is peeled and chipped from the inside to the thickness of the upper section. For the stability of the log house to weather conditions, the blanks should be oriented along annual rings. The part with thin rings is located outward, and with thicker ones - inward. Prepared billets are dried in a ventilated stack to provide shelter from precipitation. Minimum drying time ≥ 6 months. The technology for assembling a log house in the lower thicketThe design is assembled on a ready foundation, due to the light weight of the construct, most often used columnar, shallow strip and slab foundations, as well as pile-screw ones. The upper surface is covered with horizontal waterproofing from a hydroisol laid in two layers with a sticker using bituminous mastics. Work execution order:
Properly cut log house will provide durability, warmth and comfortable living in a future home. |


Popular:
New
- Do-it-yourself highchair - drawings scheme dimensions How to make a children's chair from plywood
- The better to caulk a bath from a bar and how to do it right
- How to make a wooden frame with your own hands: a step-by-step description and recommendations; Production plan for a wooden photo frame
- Ways of cutting timber and logs: options for corner joints and their differences How to chop step by step in the paw
- The construction of the hip roof - how to carry out the correct calculation and installation Installation of the rafter system of the hip roof on the beams
- The hip roof: the installation of the rafter system and installation of the structure The hip roof system complete instructions
- How to pour a do-it-yourself floor slab video Do-it-yourself concrete slab
- How to make a cellar with your own hands in the country: types and proper arrangement
- Making paving stones with your own hands: molds for paving stones and step-by-step installation instructions. What paving stones are made of.
- Painting glass canvas Use fiberglass spider web