Website sections
Editor's Choice:
- Laying ceramic tiles on plywood
- The technology of cutting the log house into the bowl - all stages
- Independent manufacture of interior doors
- Rules for grinding cylindrical logs Grinding log ends
- DIY wardrobe
- How to age a tree - the best tips with video How to make artificial aging of wood
- Recommendations for calculating the beam on the house
- Shelves in the bath: height, size and material What should be the shelves in the steam room
- Table transformer do-it-yourself drawings - photos and video
- Making wooden stairs on a metal frame and on concrete marches with your own hands for a private house How to make a staircase with your own hands
Advertising
| Built-in bed do-it-yourself drawings and diagrams. Table transformer do-it-yourself drawings - photos and video |
|
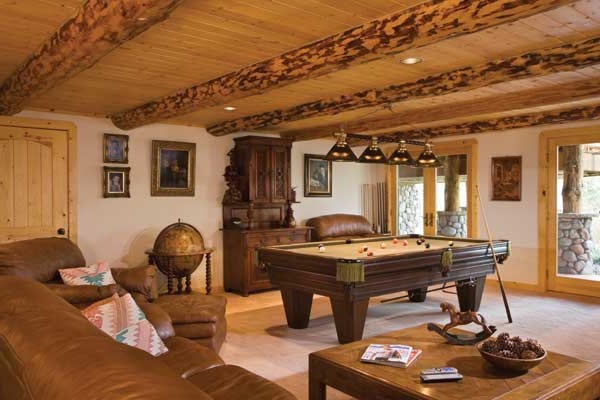
The folding bed is a convertible design. The product, if necessary, is modified into a cabinet, a furniture wall, helping to save space in small-sized apartments. The design is convenient to use, compact, technological, and provides quality rest. DIY folding bed is a budget option. Self-assembly reduces the cost of the product, allows you to develop your own design, add details (shelves, mirrors, etc.). Similar articles: Types of folding bedsDesigns with a folding mechanism are multifunctional, because combine several pieces of furniture. Manufacturers produce beds combined with a wardrobe, with a sofa or a shelving. There are designs that transform into a curbstone. A bed with a folding mechanism, mounted in a closet, can accommodate a single bed or a double bed of Euroformat. Designed options that hide 2 separate beds. The doors of a simulated cabinet can swing open or slide apart. The models of beds combined with a wardrobe and a sofa are ergonomic and allow you to arrange a place for a day's rest. The design is roomy, so only models of the double format are produced. A bed with a sofa is more expensive than other transformers. The design with the folding mechanism can be modified into a curbstone. In the disassembled state, the product is a sleeping bed, and during the day it frees up space for the office. The model is budget because does not require a powerful lifting device. To place a folding bed on the balcony is an ergonomic solution for small studios. But to organize a place of rest, it is necessary to insulate the room. Folding beds can be with one or several tiers. More common products are single. Designs with 2 tiers are used in the arrangement of rooms for children and adolescents.
A vertical bed is popular in small apartments. The sleeping bed is fixed perpendicular to the wall surface. The model is not limited in length and width. The size range is represented by single, one and a half and double products. The structures are massive and not intended for children's rooms. Beds with a horizontal lifting mechanism are suitable for narrow rooms with low ceilings. Designs are optimal for attics and children's rooms, as occupy a minimum of space even when unfolded. Products can be disguised as bookcases and shelves. Types of Fasteners3 types of folding mechanisms for transforming beds have been developed: manual, spring, gas. In the hand-held device there are no elements that facilitate the lifting of the bed, so physical effort is required during operation. The mounting structure is simple, reliable and budget-friendly. However, the mechanism is not suitable for children's bedrooms. The design on the springs is universal, with an affordable price. The hoist uses twisted spirals. The manufacturer gives a guarantee for the system from 3 to 5 years. During operation, the bed is required to inspect and monitor the condition of the springs. The gas mechanism is the most functional, reliable, durable. The device does not require physical effort during operation, as the bed rises due to gas lifts. The power of the mechanism is selected depending on the dimensions of the structure, the weight of the mattress. Manufacturers guarantee for devices - 10 years. The cost of the mechanism is high.
The power of the gas mechanism is selected taking into account operating conditions. Some devices have a load limit, so you need to consider the weight of the bed and mattress when choosing a wall mount system. Amplifiers and blockers are implemented in conjunction with the mechanisms to protect against arbitrary operation of the device. Drawer bed drawingsIn the manufacture of a folding bed with your own hands according to the drawings, you can use schemes with standard parameters. Author's design is also possible. You can design furniture according to drawings developed for the dimensions, the configuration of the room and the required functionality. The product can be supplemented with a chest of drawers, drawers, shelves, including them in the drawing. A typical design should be built using the parameters of the bed base, cabinet frame, lifting mechanism, decoration elements. It is required to fasten the box to the wall, based on the dimensions displayed on the dimensional and assembly drawings. It is important to accurately follow the installation diagram of the power element, taking into account the thickness of the mechanism, the height and width of the bed, the thickness of the sides, etc. It is required to display the main assembly lines in the drawings. Self assemblyBefore making a folding bed, it is necessary to prepare a set of tools, raw materials, elements and installation diagrams. You will need a wooden beam under the frame, edged boards for the crossbeams, and for the sidewalls and the headboard - furniture panels. The kit includes plywood sheets, hinges for attaching the structure to the wall, bars for legs. The tool kit includes a tape measure, a level and a square, a jigsaw, a set of screwdrivers and screwdrivers, a drill, a grinder. Assembly work is carried out on a smooth surface. At each stage, it is required to check the perpendicularity of the angles using a square. A typical design involves the assembly of an internal mechanism, a sleeping surface, facade walls, handles, belts for fixing bedding and a mattress. Do-it-yourself upright vertical bedThe design of the vertical lift includes a box, a surface for sleeping, a lifting device. For the type of fastening, the strength of the walls is important, concrete or brick panels are preferred. Work begins with the assembly of the frame, the size of which is affected by the size of the sleeping bed. The main components of the box: vertical and horizontal walls, rear panel, thrust shelf and baseboard. The depth of the frame is determined taking into account the thickness of the mattress, 32 cm is added to the indicator. For a furniture box, the width of the mattress is important, to which 16 cm is added. Details of the box are fixed with screws, the elements located on the facade are glued. Then they complete the assembly of a sleeping place, which consists of sidewalls, a headboard, a rack base. The mattress is attached to the belt loops. The box and the bed are connected by a lifting mechanism to the screws. Complete the work by installing parts. Shelves are mounted on the sides of the box, under the wardrobes under the shelves. What do you do with old furniture? What a man does not come up with in pursuit of free centimeters of living space is our reality connected with the compactness of apartments and private houses. You need to place a lot, but there is not enough space for everything. So you have to go to various tricks, one of which is the use of multifunctional furniture - transformers. With a flick of the wrist, an ordinary wardrobe turns into a bed - it is about her, or rather, how to make a bed a transformer with your own hands, we will talk in this article. Together with the site, the site will deal with the principle of the independent manufacture of such products. Double bed transformer do-it-yourself photo Do-it-yourself transformer bed: deviceBy and large, the design of a folding transformer bed is by no means complicated - globally, such a bed can be divided into three components, which you will need to first make separately, and then combine them into one product. But this is a bit later, but for now it is necessary to deal with the parts and materials necessary for their manufacture.
About the design and principles of making a transformer bed with your own hands, see this video. In fact, except for such trifles as fasteners and other accessories, this and the whole bed are a transformer for giving. There may be variations with materials - for example, a cabinet can generally be abandoned in favor of a man-made niche in the wall. The facade can be made of wood, if the appropriate equipment is available. And one more thing - for the convenience of use, the facade of such a bed is equipped with a special handle. At the same time, it serves as an emphasis on the floor in the disassembled position of the bed - it is also better to buy it in a store, despite the fact that its manufacture does not pose any problem for skilled people. How to make a do-it-yourself transformer bed in a closetWe have already briefly talked about this above, and the principle of manufacturing such furniture is very clear. Here we will talk only about some of the subtleties - by and large, there are two of them. Also, the rigidity of the design of such a cabinet can be achieved by including a capital back wall in its design. As a standard, it is made of laminated fiberboard, but here it will be better to use chipboard, the same as that used to make the cabinet body. Also at this stage of work, you must not forget about the facade, which will subsequently be screwed to the bottom of the bed. Making a transformer bed for a summer residence: sleeping placeBy and large, everything is elementary here and the whole process of making a berth can be represented in the form of three main stages of work. And the last one is the side trim. Like it or not, a wooden beam does not look very attractive. For this reason, it is necessary to close the chipboard - it can be screwed to the beam with the same confirmations, subsequently closing their hats with caps. Now the matter is small - it will be necessary to connect the wardrobe and the berth into a single whole. Do not think that this is a simple job - it is very important to install the system in the right place. In principle, serious manufacturers supply the installation scheme complete with similar mechanisms. If it is not available, contact the Internet - this is truly a storehouse of useful information, and at the same time a large landfill.
DIY bunk bed transformer do-it-yourself photo And in conclusion of the topic of how a transformer bed is made with one's own hands, it remains to add only one thing - exactly according to the same principle a bunk berth can be made. Naturally, with the exception of some details. Here it will be necessary to think carefully about the support for the upper berth - this problem is aggravated by the fact that this support should have a decorative appearance, since it will be on the front side when folded. In a small apartment, a wardrobe bed can be a real salvation. During the day, it does not take up much space, but is decomposed only at night. In addition, such transformer furniture is not difficult to make on your own. And if you give free rein to imagination, then it will combine not only a berth and storage boxes, but also a desk. But before you begin assembling this interior item, you need to draw up competent drawings of future furniture. Figure 1. Drawing of a wardrobe-bed. Drawing up a drawingIn order to make a competent drawing, it is necessary to correctly calculate the dimensions of future furniture. As a rule, a transformer bed is assembled taking into account the dimensions of a particular room. If you have a narrow but long room at your disposal, it is more reasonable to make a tall cabinet. A folding bed will occupy its central part, additional storage spaces can be arranged on the sides, and mezzanines can be equipped at the top. Such a design is shown in Fig. 1. If the room is square in shape, then transforming furniture can be more complicated. Now in stores you can find modules in which a desk becomes a retractable element, and the berth is located on 2 tiers.
Figure 2. An example of a cabinet-bed design. For self-production, the most difficult part is the mechanism for raising the bed, which is cleaned in a closet. The easiest way is to purchase a finished design, sold in an assembled form. But as a rule, such mechanisms are not cheap. The way out of the situation may be the acquisition of individual elements of the system and self-assembly of the mechanism. At work, instructions will help you, which manufacturers place in the catalogs of finished furniture. An example of such a drawing is shown in Fig. 2. When drawing up the scheme, you can provide your own dimensions. But make sure that the overall proportions of the product are maintained.Otherwise, the wardrobe bed will not have the expected functionality. Back to the table of contents Materials and ToolsTransforming furniture is usually made of chipboard, chipboard (laminated particle board) or a joinery. It is the latter material that has the greatest durability. But natural wood is more expensive. Therefore, masters prefer to use chipboard. But plywood, even thick enough, experts do not advise taking. Since its service life does not exceed 5-7 years.
Figure 3. A table-bed is especially convenient and practical to install in a teenager’s room. In addition to the main material, a beam with a cross section of 5 * 5 cm and an edged board (1.5 * 5 cm) will be required. It is most reasonable to use Eurobolts as fasteners. This type of connection becomes much more reliable than when using self-tapping screws. And nodes, which do not have a serious load, to connect using wooden dowels. For work, you will definitely need the following tools:
Do not forget about the measuring tools that will help to assemble the wardrobe-bed correctly. You will need a centimeter tape measure, a square and a building level. It is wiser to prepare everything you need in advance. This will allow you not to be distracted from work. 4109 0 0 Do-it-yourself transformer bed - step-by-step plan and 5 decor optionsFolding furniture is considered the best way to rationally use living space in small houses and apartments. Let's take a look at the popular models of transformer beds, and home craftsmen will receive step-by-step assembly instructions and 5 decor options for the folding bed facade. Determine the design and construction of the future bedBefore you design and purchase material, you need to decide which design you need. For decades of furniture experimenting, craftsmen have come up with many models of transformers, it’s impossible to talk about everything, so we will focus on proven and most popular options. Bed in the closetThis type of collapsible structures is considered the most popular and affordable for self-assembly. A box with a mattress is created, which in the area of \u200b\u200bthe head is attached to the folding mechanism, as a result, the entire panel rises vertically. There are 2 options for rollaway beds built into the closet:
Sofa bedHere we are dealing with the same folding bed decorated under a wardrobe, but only on the facade of this wardrobe is a real sofa attached. When a person needs to make a bed, he removes the pillows of the sofa back and flips the panel with the mattress. Such models are especially popular in one-room apartments and studio apartments. The main plus is that when the bed is folded, the owners get a full, comfortable place to sit. Such models are not suitable for self-assembly, as the master will have to create a new or remodel the old sofa, and such works require serious professional skills.
Table bedTables capable of transforming into a bed were originally designed for a small room of a teenager, therefore single models prevail here. Compared to the previous two options, they differ in more complex mechanics. It’s realistic to make such a transformer with your own hands, at a cost price the design is relatively inexpensive, but all details require an exact fit. If this is your first time encountering the creation of furniture, it is better to order the manufacture of the main components in a professional workshop, and only assemble it yourself at home.
Two-level transformerIn fact, the bunk folding design is an improved model of a folding bed cabinet. The photo below shows that the mattress shield is simply cut in half and a folding mechanism is installed on each of these single sections. And to ensure synchronization and reliable support, parallel plates are installed on both sides, which replace the ladder to the inhabitant of the second tier. It is not much more difficult to make this model with your own hands than a wardrobe-bed, of course there is more work, but the technology is simple and of the same type.
Chest of drawersFrom a technical point of view, a chest of drawers or, as it is also called, a bedside table, which is absolutely identical to the models built into the cabinet. Only the size of the mattress folding shield and the orientation of the bed differ (it is attached to the side). All nodes are the same, but the box is decorated not under the cabinet, but under the cabinet or chest of drawers.
Ceiling bedTo save space, such transformers are ideal. The only problem is that these designs are assembled to order and have a high price. Briefly, here on the wall are installed rails with a powerful lifting mechanism that raises the mattress shield in a horizontal position to the ceiling. In order not to spoil the interior, a plasterboard hanging box with a niche under the bed is arranged in the ceiling, in which the horizontal structure is placed. Without any special knowledge, undertaking the construction of a ceiling bed is simply stupid. Firstly, we need an accurate calculation of the load on the mechanism, plus the calculation of the power of the electric drive with a winch, and secondly, if the master makes a mistake, then all this heavy construction can fall off the ceiling and crush someone.
Manufacturing processAs mentioned above, the closest bed is considered to be the simplest design for self-production, so we will focus on it. Tools and materialsAs the main material, we will use chipboard with a thickness of 16 mm or more. According to experience, it is not advisable to buy a whole sheet in a hardware store, take it home and dissolve it manually, it is easier to order material in the nearest furniture workshop, for several reasons:
In addition to the chipboard, we need a mattress shield. It can be made independently from a wooden bar and plywood, or you can buy a finished metal structure. The first option is 2 to 3 times cheaper, the second is considered more reliable.
From auxiliary fittings you will need:
If you order cutting parts in the workshop, then to assemble the structure you will need the following tool:
How is the built-in bed going
The last step - decor of the finished product 5 options
ConclusionThe method of arranging a transformer bed described above is easy to install and is relatively inexpensive, and the 5 decor options presented can completely transform the interior of the room. There are alternative approaches to the video in this article. If after studying questions remain, write in the comments, I will try to help.
If you want to express gratitude, add clarification or objection, ask the author something - add a comment or say thanks! With small apartments in which a large number of people live, there is a need to save space. The issue of furniture placement can become an acute issue in a children's room, especially if it is single, and several children of school or preschool age are forced to sleep in it. To save space, you can buy a folding bed. You can create a drawing and make a wardrobe bed with your own hands. This will significantly save financial expenses and will allow you to create a bed of the required dimensions, taking into account the color scheme of the room and the decorative elements present in it. Before starting the bed manufacturing process, you must have a drawing, following which you can make a wardrobe-bed with or without additional shelves. A detailed layout of parts will help create a quality bed as quickly as possible, which will function correctly. Such schemes most often involve the manufacture of beds with sizes 1800 * 2000, 2120 * 1715, 2040 * 2200, 1731 * 2020. These make double beds. Single ones are most often intended for children's rooms, therefore they are smaller. Since their installation is carried out independently, it is possible to create a drawing of the size of the bed, depending on the availability of space, the age of the child and the possible use of this bed by younger children after the older ones are older. To create a transformer bed, drawings must be as accurate and clear as possible. To make a wardrobe bed with your own hands, you will need such tools:
This is a minimal set of tools; in the process, others may be required.
Instruments It is also necessary to have the following materials:
It is also a minimal set of materials. Cutting is done according to the drawing. It is done like this:
Materials Frame assemblyTo assemble the frame, you need to know the clear dimensions of the proposed bed. They depend on the size of the bed and on the type of bed: single or double. For the frame, you need 2 side plates located along the frame, 2 side plates for fastening along the width of the bed, as well as the rear base. The back wall will occupy the entire area of \u200b\u200bthe so-called cabinet, so it should be larger in size than the mattress that will be on the bed. Based on these considerations, it is recommended that the frame be made 15 cm wide and 40 cm large in length (a margin in length is necessary for folding). Having decided on the size of the side plates and the back wall for the frame, you must:
We carry out a cut
Grinding coating
We connect the elements with fasteners Mattress boxCreating the mattress box yourself is the most difficult part in making a wardrobe-bed. When cutting, cutting parts from furniture plates (or from other materials), carefully follow the numbers indicated in the drawing. Thanks to this, it will be possible to create a box that will correspond to the size of the frame. To make the box you need:
How to make a box:
We carry out a chipboard cut
Making the side and back wall
We lay lamellas Mounting the transformation mechanismThe lifting mechanism performs the function of the movement of the box in relation to the immovable frame. How to mount:
To facilitate the transformation, you can use additional parts that simplify the movement of the mechanism (gas shock absorbers, counterweight). Such mechanisms are especially necessary if a baby bed or teenage bed is made. It is not recommended to allow children to fold and unroll a folding bed on their own, but even in this case, it is necessary that the children can independently lay out the bed without any help, therefore, the transformation system built into the cabinet with their own hands should be easy.
Create a headboardThe head of the transformer cabinet should be made of soft material, especially if the bed is for children. It is desirable to make soft not only the headboard, but also the lower part of the side walls of the frame. The easiest option for a soft headboard that you can make yourself - soft foam padding. The role of foam rubber can also be performed by a synthetic winterizer. How to make a headboard:
We cut sheets
Making holes for buttons
Glue the foam
We fasten an upholstery
We mount buttons LegsThe legs for such a bed must be movable and turn around at least 180 ° C. In such cases, it is convenient to use metal legs connected together and representing a metal bar with corresponding bends. How to fix:
When unfolding the transformer, the legs must be rotated 180 degrees and put a bed on them. When the box is lifted, the legs are tucked so as to be hidden inside the so-called cabinet. In addition, a metal strip connecting two legs (or a straight strip of a cast leg) to each other simultaneously performs the task of holding the mattress on the mattress pad. Thus, its movement during folding and unfolding of the bed is excluded. For the same purpose, you can install stops at the upper edge of the mattress pad. Limiters can be horizontal bars. There may be several legs, but in this case the folding process is complicated. The leg should be strong to support the weight of the box, mattress, bedding and sleeping people.
We measure a box
We get special legs
Make holes
Fasten the leg Decoration and fittingsWith the help of decorative elements, you can completely hide the presence of a transforming bed in the room. There are many ideas for decorating the bottom trims of a bedside box that looks into the room. One of the most beautiful and simple options is to create an imitation of a three-door or four-door cabinet.
Another good option to hide the presence of a transformer bed in the room is to mount this cabinet in the furniture wall, creating a bed of furniture plates of the same color as the wall. Next to other parts of the wall, the cabinet will look quite natural, especially if you add decorative elements such as handles and trims. At the same time, neighboring cabinets in the wall can be used to store bedding, which will greatly simplify the process of cleaning the bed every morning. |


Popular:
New
- Do-it-yourself highchair - drawings scheme dimensions How to make a children's chair from plywood
- The better to caulk a bath from a bar and how to do it right
- How to make a wooden frame with your own hands: a step-by-step description and recommendations; Production plan for a wooden photo frame
- Ways of cutting timber and logs: options for corner joints and their differences How to chop step by step in the paw
- The construction of the hip roof - how to carry out the correct calculation and installation Installation of the rafter system of the hip roof on the beams
- The hip roof: the installation of the rafter system and installation of the structure The hip roof system complete instructions
- How to pour a do-it-yourself floor slab video Do-it-yourself concrete slab
- How to make a cellar with your own hands in the country: types and proper arrangement
- Making paving stones with your own hands: molds for paving stones and step-by-step installation instructions. What paving stones are made of.
- Painting glass canvas Use fiberglass spider web